


Miniatures With Polymer Clay - Make a Prickly Pear Cactus
Miniature Prickly Pear Cactus
by Chelsea Andersson
There is something about miniatures that has always made my heart sing.
As an adult, I found a new appreciation for miniatures. In my tiny Bay Area apartment, large scale artworks take up too much space. I always want to keep experimenting with new techniques and styles, and found that creating work in miniature was the best way to keep exploring my creativity. Now, I make dollhouse and other miniature craft kits so that you too can find the joy in crafting and decorating on a small scale.
This polymer clay cactus was one of the first pieces I made in miniature as an adult. It makes me smile every time I look at it, and I hope it brings the same joy to you!
Gather Your Materials
- A 1" mini wood planter pot
- Green, red, & brown polymer clay
- Toothpicks
- A paper clip
- Wire-cutters or sharp scissors Latex Gloves
- An Oven

Shop Polymer Clay Supplies


Step 1: Prep your station
Polymer clay is very sensitive to dust and surface textures. Try using a piece of regular clean white paper to line your work area. The paper is smooth, dirt free, and easy to change when it gets covered with clay!
Step 2: Start with the dirt

Start with your brown clay and wood planter pot.

Condition your clay by rolling it between your hands to warm and soften it.
Press the brown clay into the pot.

Remove excess clay and smooth the top, then set aside.
Step 3: Shape the cactus
Think about the size and shape of your cactus. I am making a traditional prickly pear cactus. They usually have a large trunk that grows different size pads up. Prickly pears typically grow with flat, rounded pads.
 Break your green clay into pieces of various sizes
 The large pieces will serve as the base of your cactus, and the smaller pieces will become the top paddles.

Condition each piece of clay by rolling it between your hands to warm and soften it.

Form each piece into a smooth, round, ball.
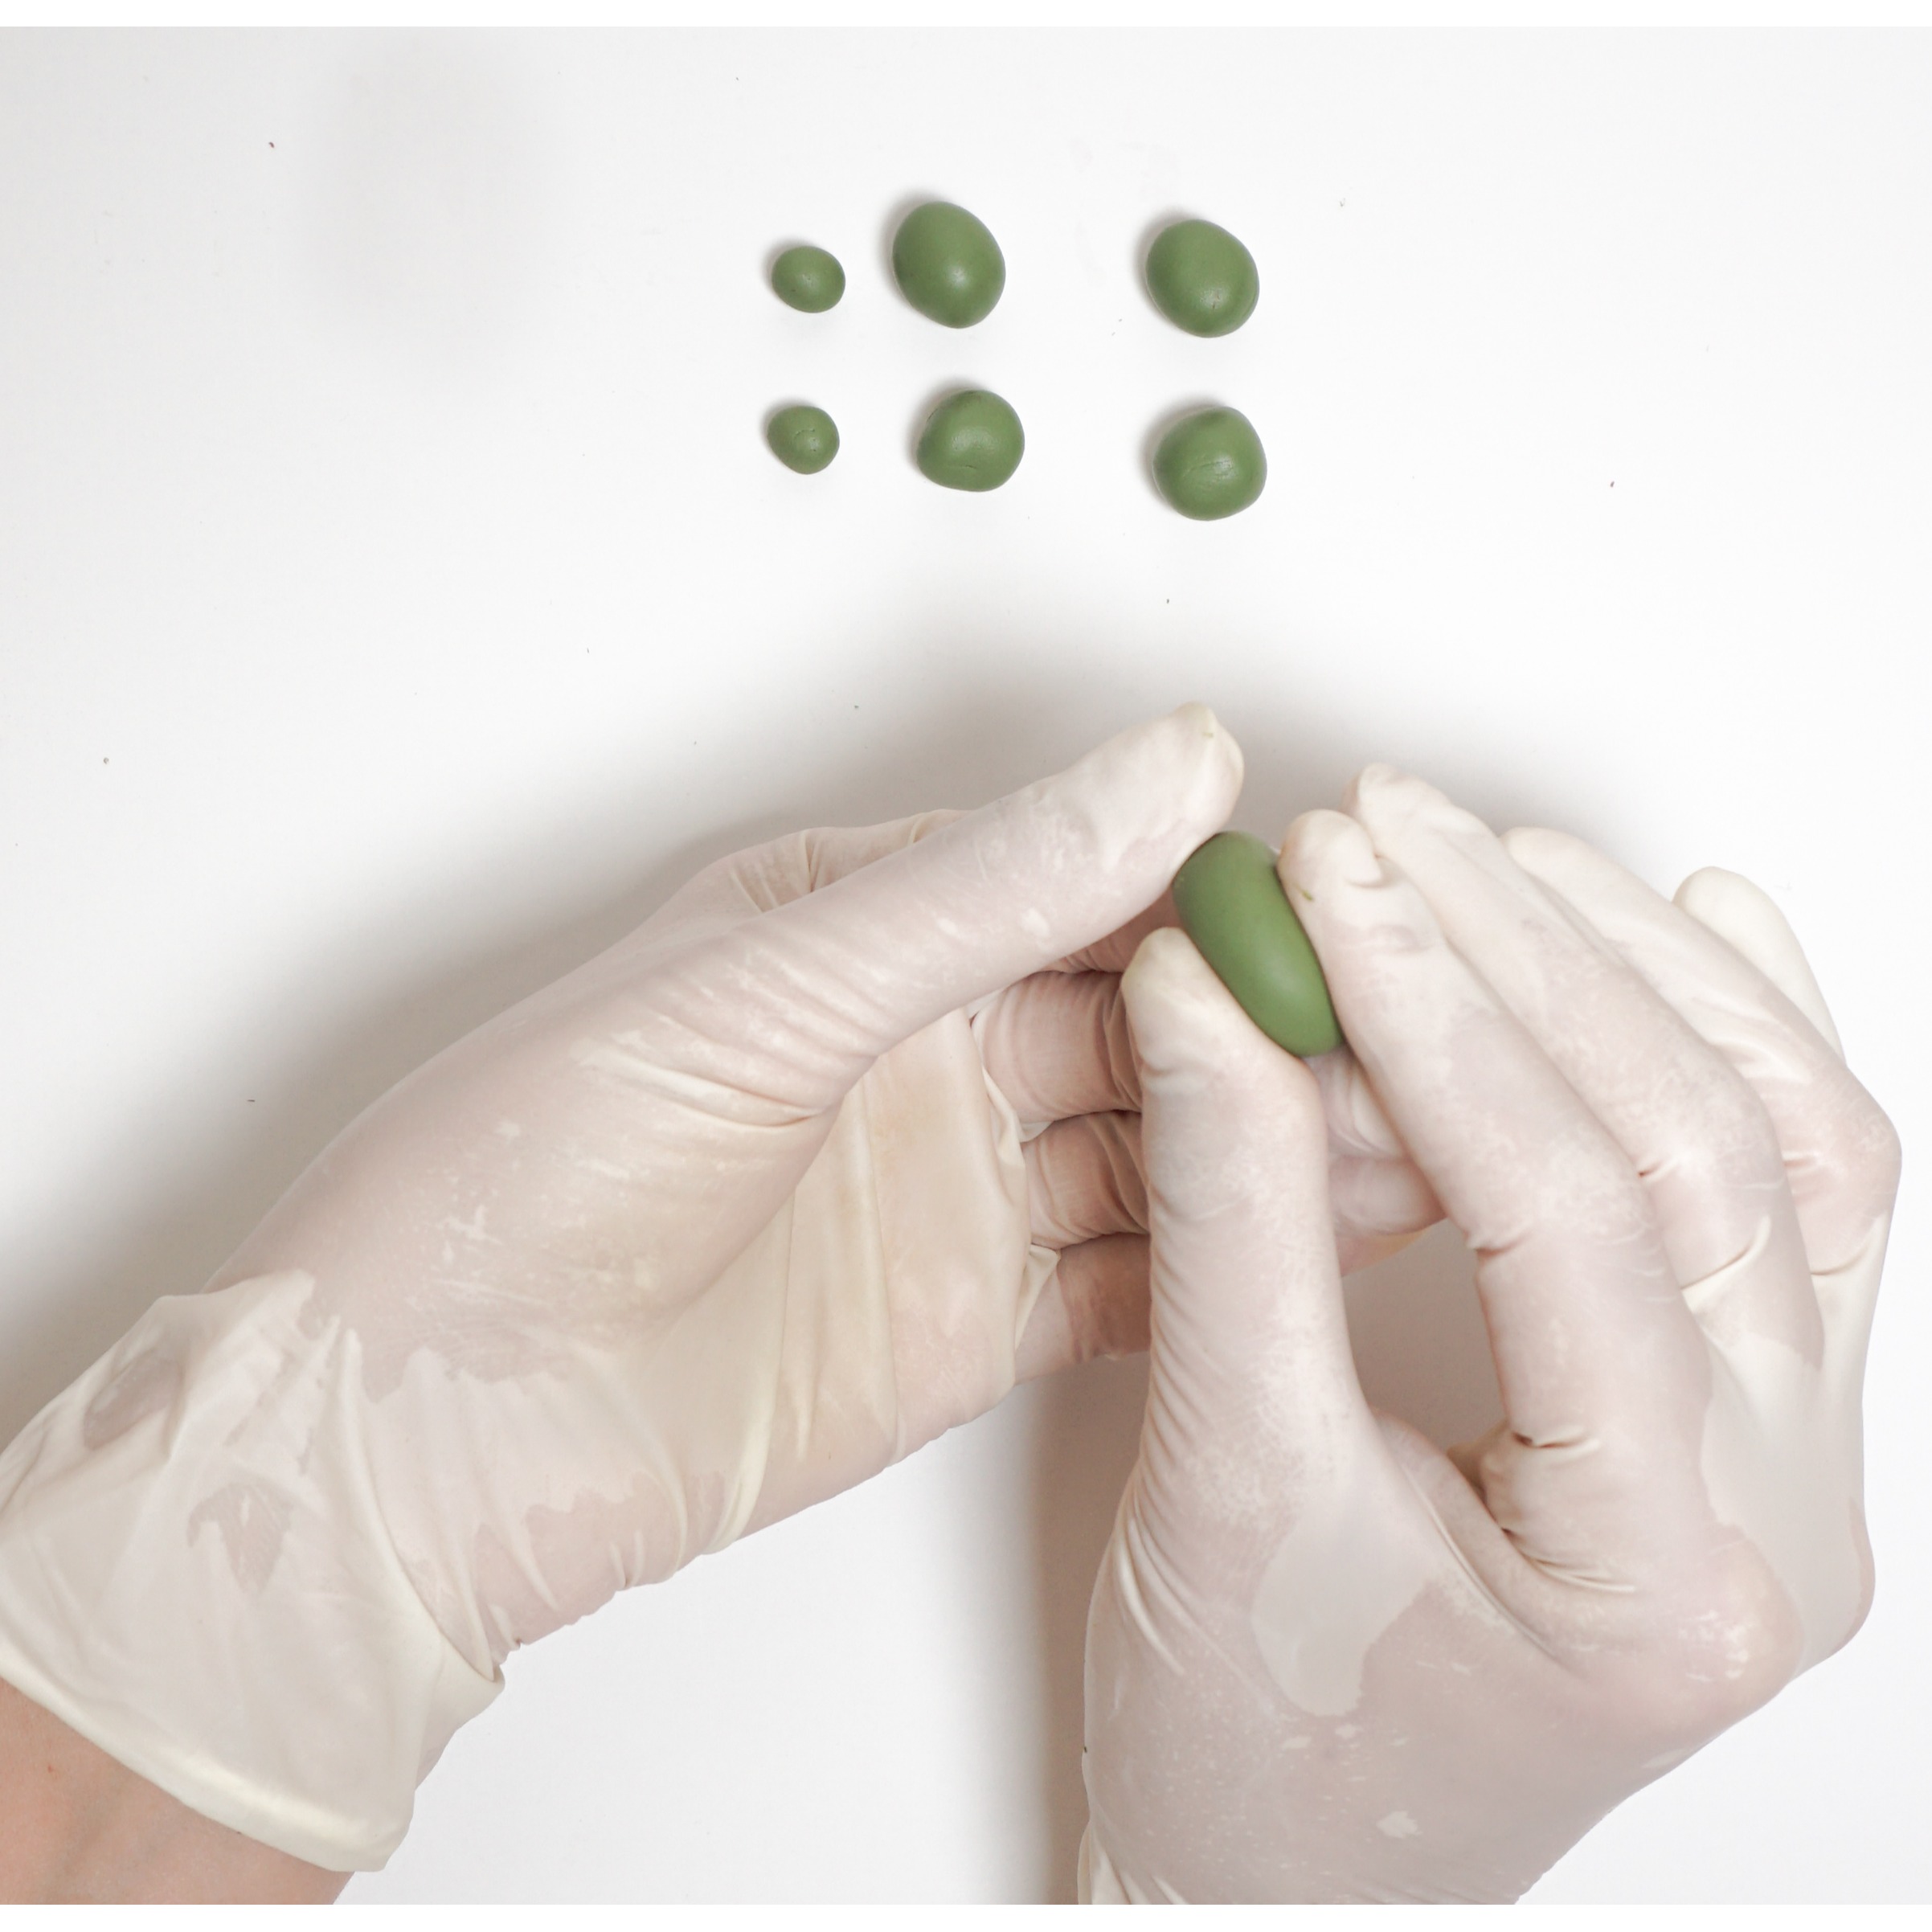
Next, gently press each sphere to flatten it.

Smooth the edges.

Pinch the end of the paddle to a slight point.

Repeat the process of flattening and pinching each paddle. Smooth each paddle as needed.

Use your toothpick to score short lines onto the side of the paddle.

Repeat on both sides of the paddle and continue to add short lines to the rest of your paddles.
Step 4: Put it all together

Cut a 1-inch piece of wire which will support the cactus structure.

Insert the wire into the largest paddle, be sure not to poke out through the top or side.

Insert the wired large paddle into the clay-filled pot.

Cut a ½” piece of wire and use it to attach the next largest paddles.

Place it in the brown clay next to your first pad.


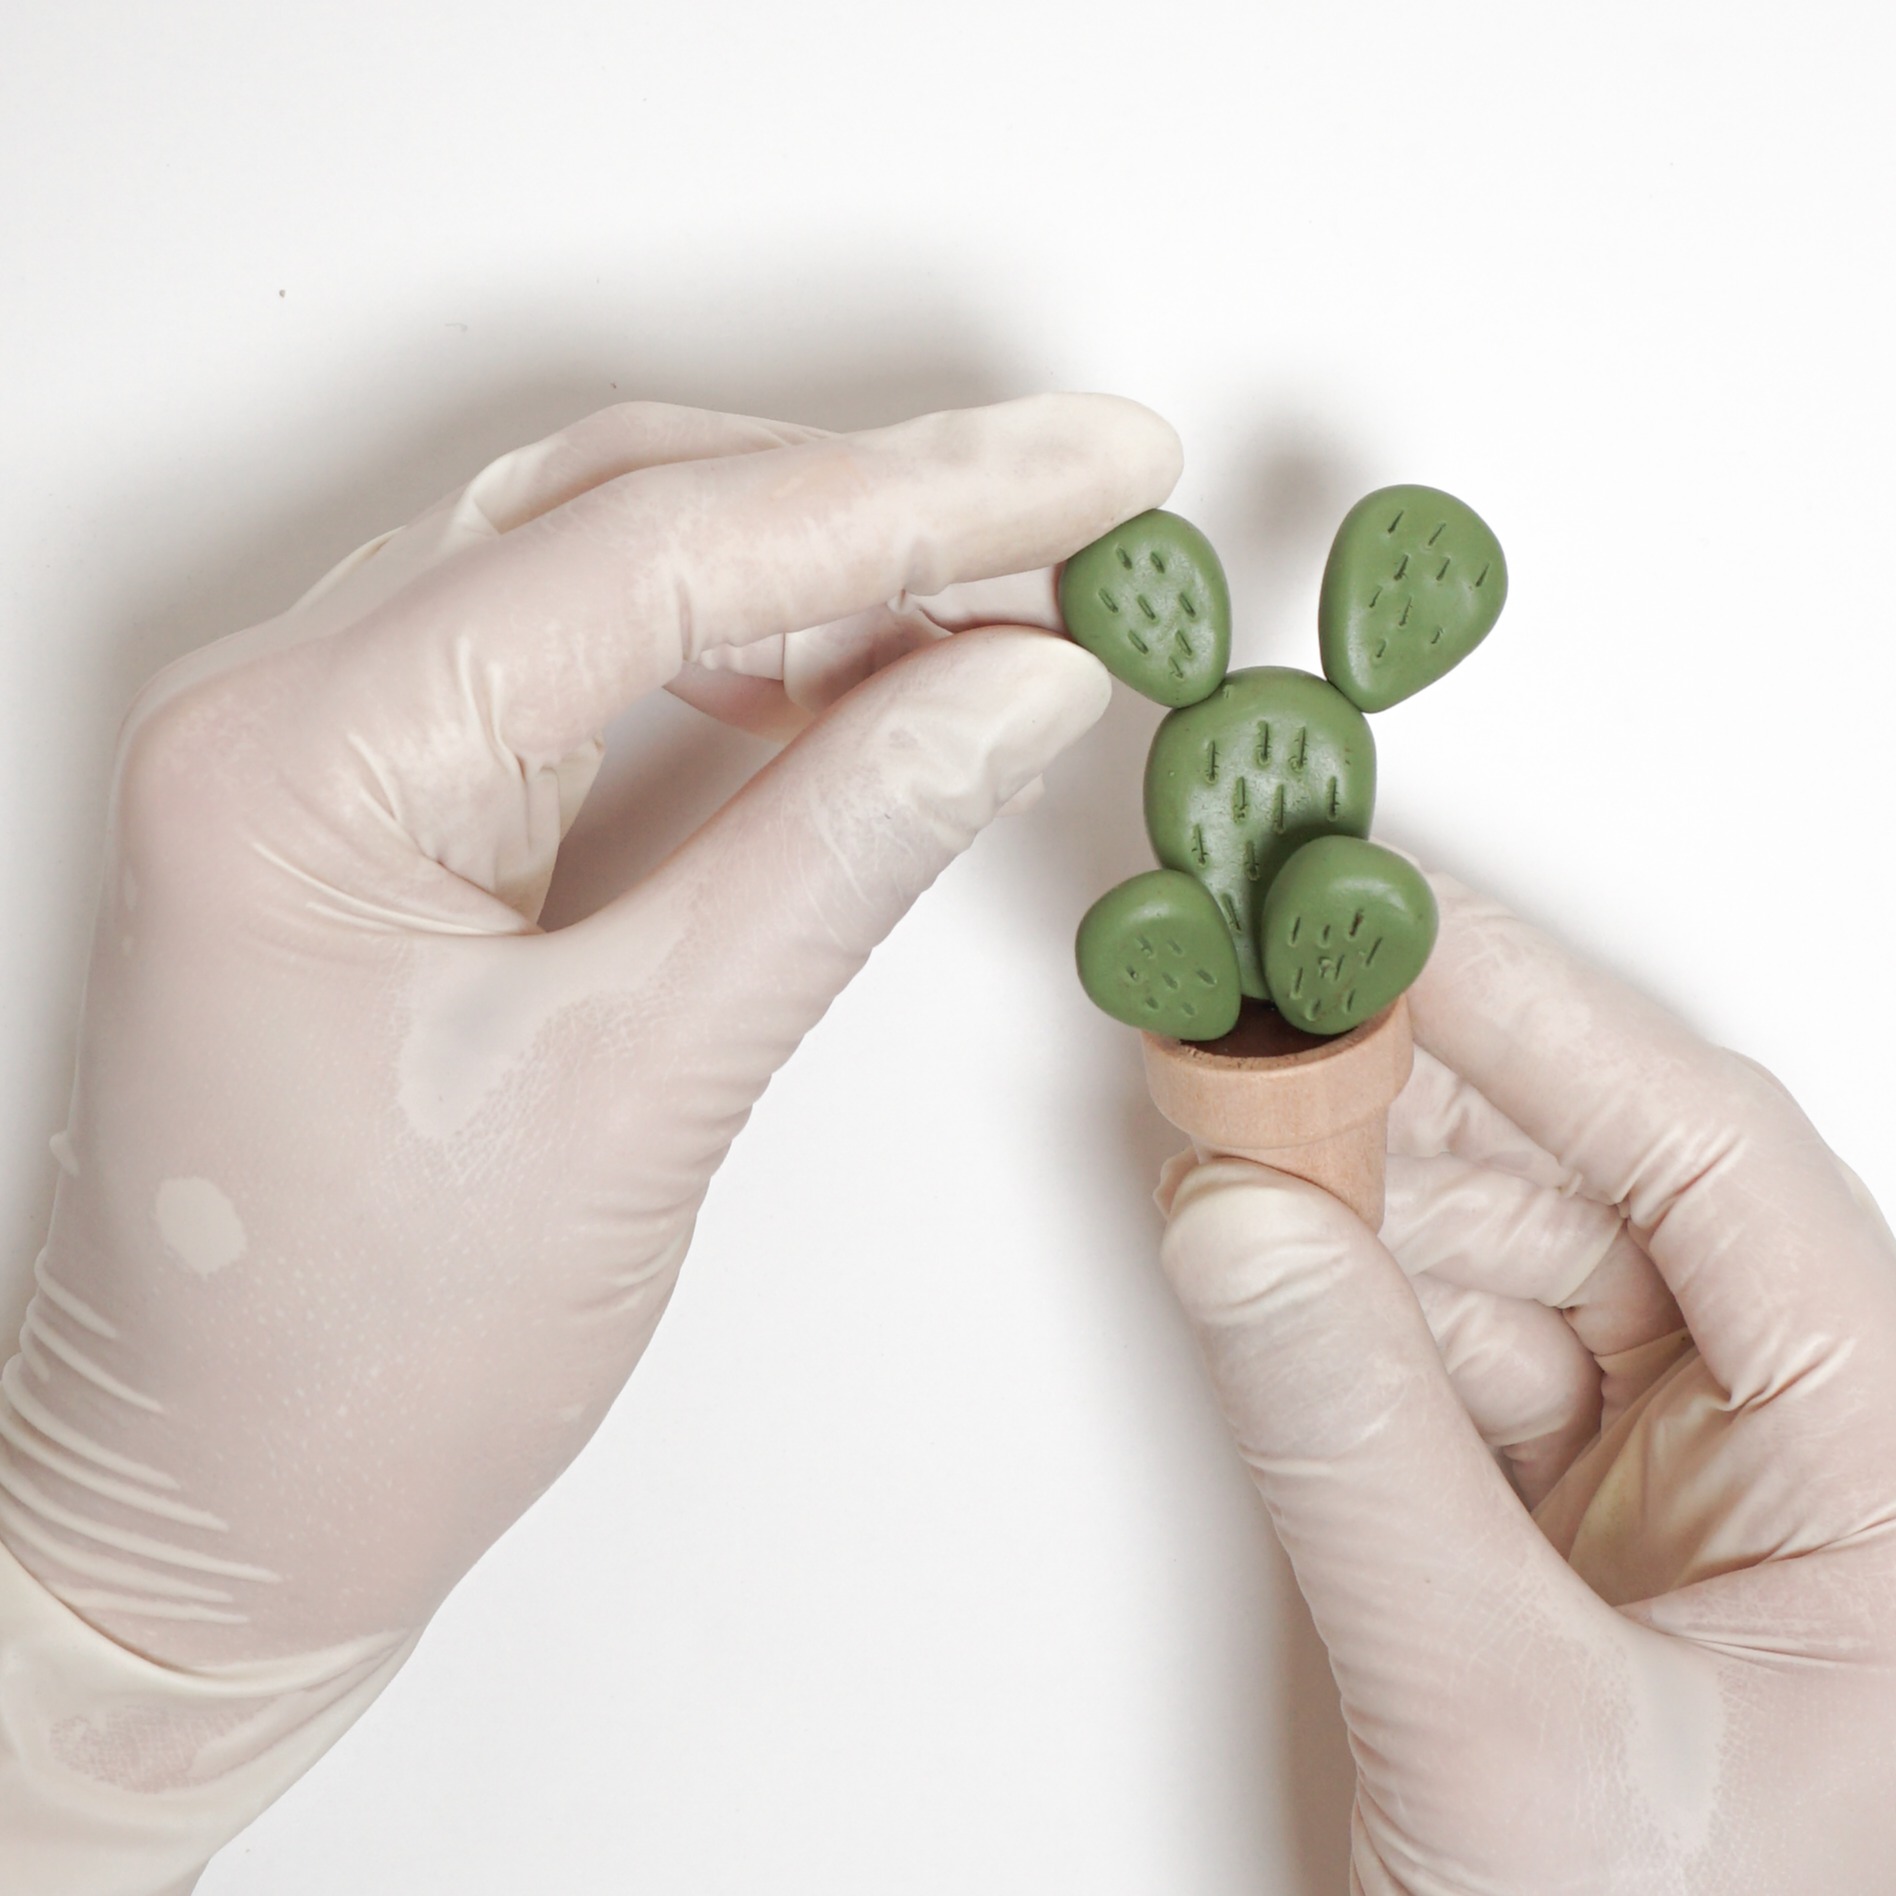
Repeat this process to attach all of the cactus paddles.

Now your cactus base is complete!
Step 5: Add the prickly pear

To create prickly pears, grab your red clay

Break off small pieces of clay approximately ⅛” in diameter

Using your toothpick, pick up the rounded pears and press them into the top of your desired paddles

CUTE!
Step 6: Bake!

Before baking, gently press the paddles until secure. Ensure that it is balanced when upright, and make any necessary adjustments to make sure it can stand on its own.

Preheat your oven, and bake your cactus upright in its pot at 275 degrees, for 30 minutes. Thanks for follow along, enjoy!
SHOP ChelseaMakes


Chelsea Andersson
Chelsea is a New York grown, California Bay Area-based, maker, and landscape architect. She loves meeting other makers and artists and working to create incredible things.


