


Top Merchandising Tools for Professional Shops
Make Custom Vinyl Displays
By Jennie Lennick
Essential Tools for Professional Shops
Learn how to use Cricut tools to create vinyl marketing messages and custom uniforms for retail stores. In this tutorial I share how to create iron on transfers and vinyl graphics with the Cricut Maker 3 and Easy Press 2. Our brick-and-mortar boutique relies on this equipment to frequently change our shop displays with ease.
Vinyl Cutters Make Merchandising a Breeze

A vinyl cutter is a magical machine.
Suddenly, an artist can adhere their designs on almost any surface! The world truly becomes a canvas! I am constantly remerchandising my shop, and with the Cricut Maker 3, I can easily create beautiful displays to inform and delight our customers.
One of the many marvelous features of the Cricut Maker 3 is you can cut iron-on transfers! Now, I am able to make custom aprons with my brands’ logo! All my employees are so excited to wear their new uniforms to work in our shop.
In this tutorial, I’ll share:
- A quick overview of Cricut’s design space
- How to cut and prepare your vinyl for installation
- How to install vinyl on a mirror
- How to use the Cricut Easy Press 2 for heat transfers
Gather Your Materials

This post contains affiliate links and I earn from qualifying purchases.
Creating Custom Vinyl and Iron On Graphics with Cricut

Use Cricut Design Space to Plan Your Vinyl Graphic

Cricut’s Design Space was easy to navigate and made laying out my vinyl cutting projects a breeze. I uploaded my logo for my apron and placed it on one of Cricut’s templates to preview the final product. They have a ton of different templates like t-shirts in various sizes, mugs, and more! Using the guide was super helpful to make sure I got the size of my logo just right.
Make Your Graphic Out of Vinyl

I chose what material I was cutting into (for my projects, I used Cricut’s Smart Removable Vinyl and Smart Iron-On Vinyl), and with the click of a button, like magic, the tool cut my vinyl! I was astonished at how simple it was and how quickly the machine moved.
Prepare the Vinyl

After the Cricut Maker 3 cuts your vinyl, you’ll need to prepare it for installation, whether it’s ironed onto fabric or adhered to a mirror.
First, cut away any excess vinyl with scissors. Carefully peel the background materials. I used my fingernail to get in between the layers and then gently curled the vinyl away.

Use the weeding tool that comes in the Basic Tool Set to pull excess material away from your graphic. I found this incredibly satisfying!
It's easy (and fun!) to pull away big areas of vinyl.


With a more intricate design like small text, it can be trickier to separate the extra vinyl. Take a deep breath and go slow!

Use the weeding tool to get the tiny bits of vinyl out of the inside of letters.
Finishing Your Projects
My New Dressing Room Mirror


Cut a piece of transfer tape equal to the size of your graphic. Peel away the backing paper and stick it to your design. Use a credit card or the Cricut scraper to adhere the tape to your vinyl.


Clean and dry your surface. Peel away the backing very carefully and place your graphic where you’d like it on your mirror. Smooth the transfer tape over the surface with your hand first, then the scraper or a credit card. Carefully peel away the transfer tape and bask in the glory that is your new vinyl!
The removable vinyl is sturdy enough to clean but easy to remove with no residue, so you can frequently change your marketing messages! We’re planning to update our mirror with seasonal graphics for the holidays!

I am thrilled with my new mirror vinyl in our dressing room! I cant wait to see my customers sharing the outfits they are trying on social media!
Making My Iron On Transfer Logo Apron
I’m so excited to make my custom apron! Before you begin, check out the Cricut Heat Guide for temperature and time settings for your specific fabric and transfer materials.

Before transferring, protect your surface with a thick towel. Place your fabric on the towel and press for 15 seconds to remove excess moisture and wrinkles.

Peel away the backing and stick your graphic on your fabric.

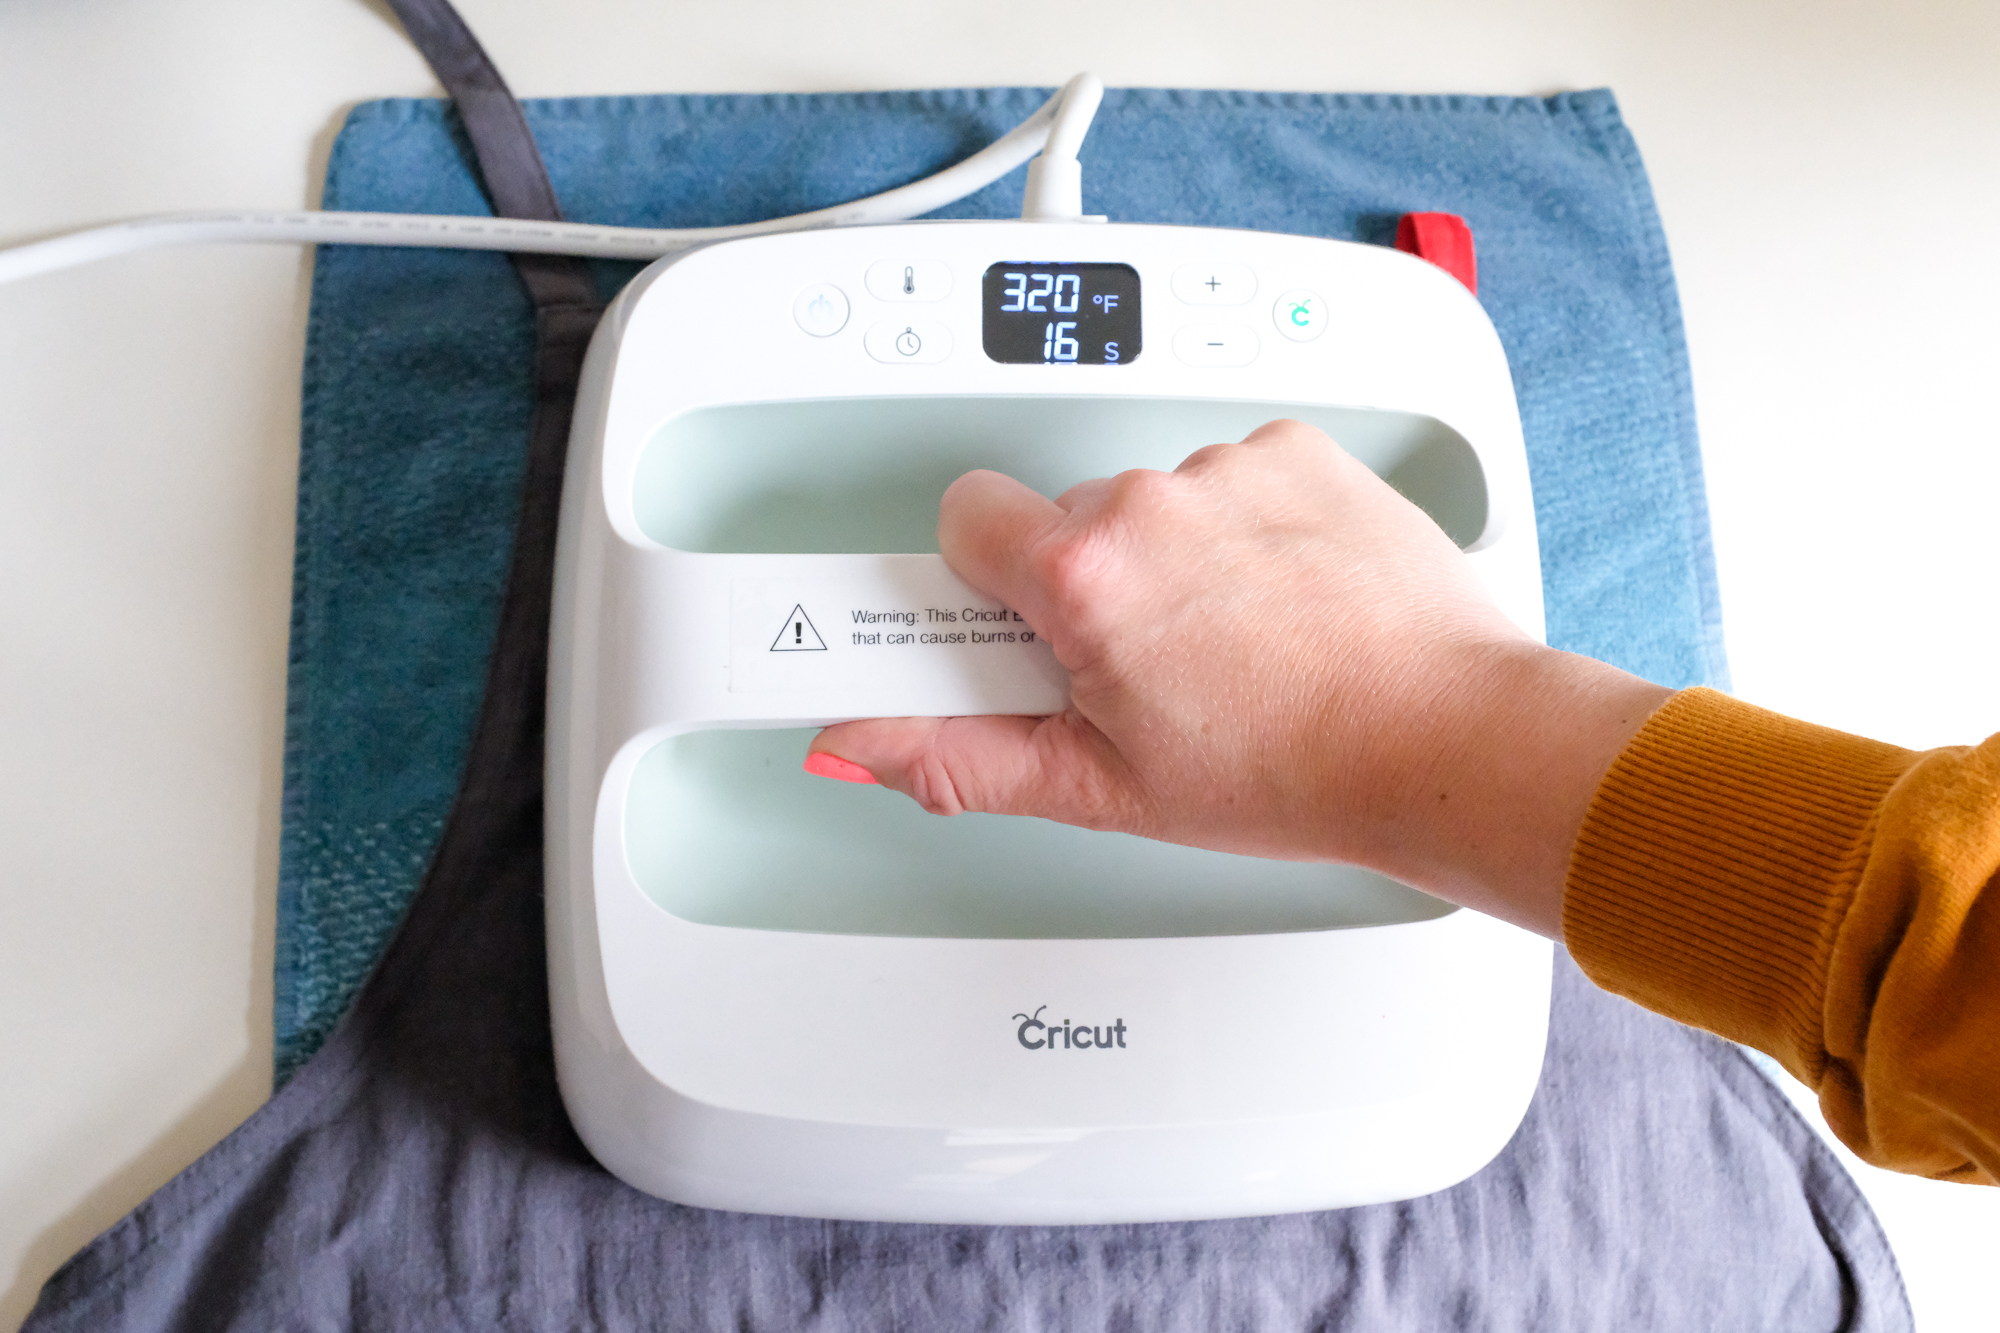
The Cricut Heat Guide instructed me to set the Easy Press to 320 degrees and press for 30 seconds on the front, 15 seconds on the back for my linen apron. I loved how straightforward the process is!

Allow your transfer to cool slightly, and remove the plastic film. It’s ready to wear!

I love my new linen apron! Each of my employees instantly requested one, and now I can quickly make them for the whole team! It feels so lovely to put on a branded apron before starting work- it adds a level of professionalism to our entire retail experience.
Want to learn more about customizing your clothes? Check out the following blogs:
- Embroider Anything with Water Soluble Sticker Patterns
- Ice Dye Adventures
- Embroidery On a T-Shirt: How to Stitch on Stretchy Fabric
- Sashiko Mending
- Shibori Indigo Dyeing
For more inspiration, check out all things Cricut here!

JENNIE LENNICK
Designer, entrepreneur, and lover of crafts! Boss Lady at Jenny Lemons in San Francisco


