


Drawing a Field of Cactus with Dan Garzi

Drawing with Paint Markers
As far back as I can remember, I’ve always loved to draw. Painting is fun too - but there’s just something different about putting a pen or pencil to paper that I find really satisfying. For me, it makes it more similar to handwriting. I also really love icons and typography (I’m a graphic designer by day) and so this writing/drawing connection is the source for a lot of inspiration in my work.
There are lots of repeating themes within my work: cacti, palm trees, fish, birds. Natural forms, but drawn in such a way that they become simplified and easily repeated. In a way, they become like my own visual alphabet of icons that I can draw and re-draw in different compositions. This way of working also allows me to keep as much integrity within the artwork when I go from itty-bitty doodle in my sketchbook to a giant finished canvas piece.
Paint markers are some of my favorite tools to use in the studio. I like to use Sakura Permapaque - they cover large areas nicely, and they come in the bright colors that I love to work with. I’ll be using these to walk you through my drawing process while we build this cactus composition.
Gather Your Materials:
- Pencil
- Bristol or watercolor paper
- Art Markers
- Straightedge or Ruler

Shop Drawing Supplies

Soft Cover Sketchbook
These notebooks have colorful covers and are ideal for writing and drafting in pen, pencil and marker.

Double Sided Marker
Each Marker features two distinct nibs capable of achieving multiple line widths.

Graphite Pencil
Handmade graphite pencils in artist's quality from the American traditional brand General Pencil.
Step 1: Make a small sketch
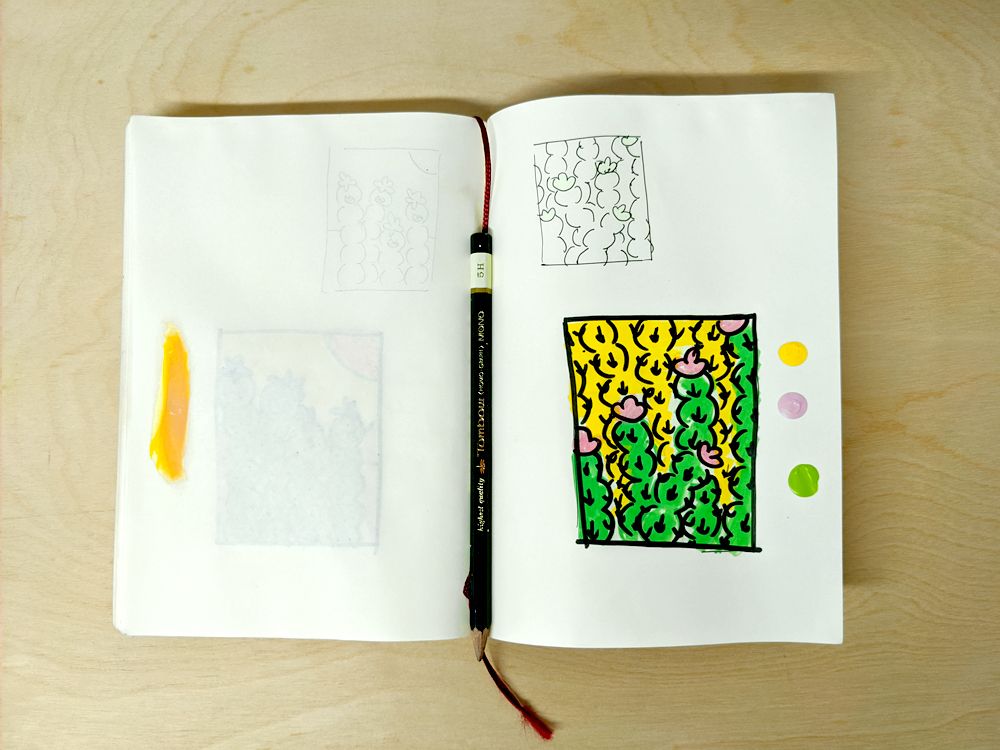
I always start with a small sketch to help frame the composition and plan out the artwork. I like to keep all of my sketches in the same sketchbook, so they're easy to refer back to over time. Draw the composition a couple of times if you need to, this will help you get familiar with the forms we're drawing.

Take a look at the “How To” image to see my process for drawing a cactus. My cacti consist of three parts - the outer volume line, the inner spikes, and the flower on top. Each one uses very simple movements that you’ll repeat throughout the drawing to fill the whole field. When you think you have a good handle on the placement and shapes, you're ready to move on.
Step 2: Transfer your drawing to your final paper
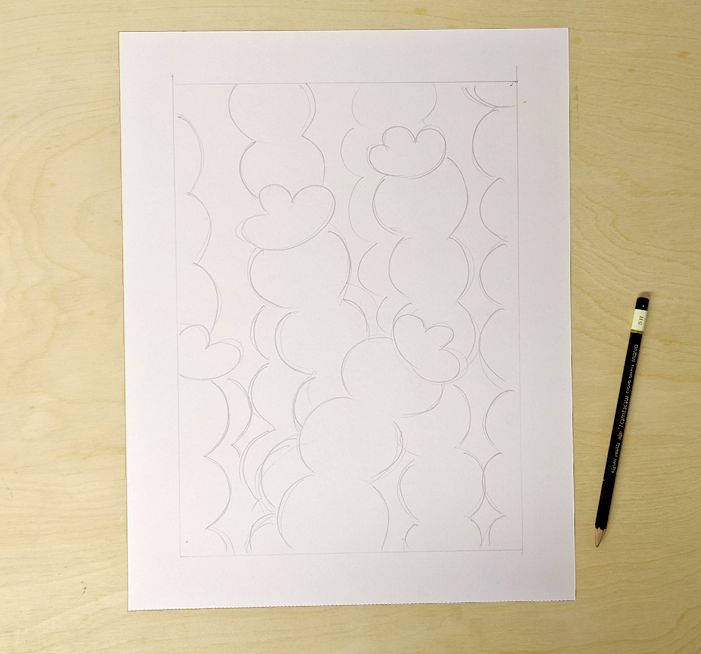
I’m going to be working on 11x14 bristol paper. I find that the weight of the paper absorbs the marker well, and it’s large enough to give the appropriate amount of negative space in the composition.
Referring back to your sketch from Step 1, start to sketch out the final composition with a pencil. I like to leave a one-inch border on all sides. You don’t have to do this, but it makes it easier to frame. And if you choose to go frameless, this allows you to have a white border around your work (sort of a DIY budget frame).
Step 3: Add color
Grab those paint markers and start filling in your drawing. Depending on which type of paint marker you’re using, you may need to pass over twice to get an even coat. I sometimes like the unevenness of one layer, but I leave that up to you.

Step 4: Draw the finishing black outline
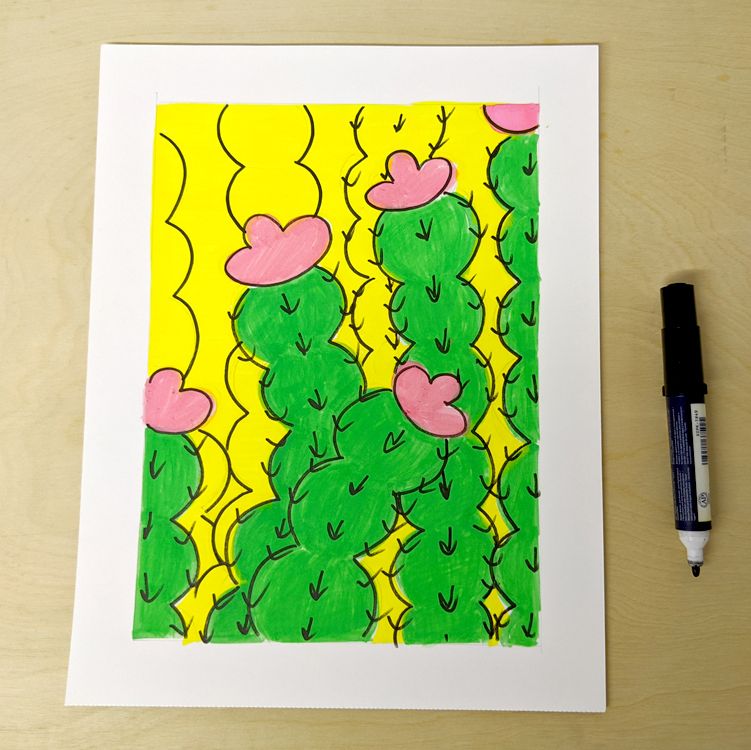
This is the fun part! It also might seem like the really daunting part. Using your black paint marker, start adding the finishing black outline to the drawing. I like to start on the inside of the composition working in sections and moving to the outer edge, saving the outer border for the very end. Try to use smooth, broad motions from your shoulder and wrist.
For the outer border, sometimes I use a straightedge to get even lines, and other days I do it freehand. Depending on how you did on the inner part of the drawing, decide if you need the straightedge for guidance.
Step 5: Sign and Admire!

All that’s left is to add your signature, and you’re done! If you’re feelin’ all that creative energy, make another!
Dan Garzi
Dan Garzi is an Artist & Designer living in San Francisco, CA. Inspired by his studies in design, fuzzy childhood memories, and a healthy fear of emptiness he is driven to create a unique visual language, one which might amuse, intrigue, and occasionally confuse.


