


Ice Dye Adventures - DIY Tutorial
Let's Ice Dye!
By Jennie Lennick
Magical Ice Dye
Learn how to dye brilliant, flowing colors with ice dye! In this tutorial, I go over how to prepare your fabrics for ice dye, setting up a dye station in your home, sprinkling dye, and rinsing out your project. This technique is fun and accessible for artists of all ages!
Ice dye is an easy way to make your dyed fabrics look like they were dipped in watercolor. To achieve this result, you cover your material with cubed or crushed ice (or snow), sprinkle on some fiber reactive dye, and let the magic happen!
For this tutorial, I am using the Ice Dye Kit from Oodlebadoodle. It has almost all the supplies you need to get started with ice dye and includes dye, soda ash fixative, instructions, gloves, and a spoon. It even has a notebook and pen so you can jot down your recipes as you go! There were a few things I needed to gather, like a tray and wire rack, a bin, and of course, ice. I had all these materials at home already, so setting up was a breeze.
Rebecca Saylor, the maker behind Oodlebadoodle, sent me a sample of 4 different kits to test out each colorway- they were all so beautiful, I am having a hard time choosing my favorite! I had a great time trying this new craft, and I hope you do too!
Meet Rebecca Saylor
Rebecca Saylor, the maker behind Oodlebadoodle, is a Pillow Maker, Watercolor Artist and textile designer. She has a passion for creating and can’t remember a time in her life when she didn’t have a deep creative energy. She will undoubtedly bring some color to your life with an oodlebadoodle creation or kit!

Gather Your Materials
- Ice Dye Kit OR
- Fiber-reactive dye powder
- Soda Ash Fixer
- Natural fiber fabric for dyeing. I used these tees and these onesies
- Rubber gloves
- Spoon
- Bucket or bin (must fit at least 2 gallons)
- Roasting Tray
- Wire Rack
- 32 oz Mason Jar
- Bag of Ice

As an Amazon Associate we earn from qualifying purchases. Thank you for checking out our recommendations!


Step 1: Prepare Your Fabric
I’m so excited to get dyeing! I scoured my house for stained white tees and found a few of my husband’s shirts to revive. I also purchased some 100% cotton women’s tees (for me) and onesies for my baby. It is super important to use only natural fibers like cotton, linen, wool, or silk with fiber reactive dye- if you dye garments made from synthetics, the colors will not bind with the fabric.
Once you’ve chosen what you’d like to dye, wash your fabric with a neutral detergent. Washing will remove any sizing (a protective finish added to yarns before weaving in to fabric) that could be present in the material before dyeing.

Fill your mason jar with 24 oz of HOT water. Dissolve 2 oz of soda ash into the water.
Stir the dissolved soda ash mix into your bucket with 2 gallons of water. Soak your fabric, making sure the mixture completely covers it for a minimum of 20 minutes.
Wring the solution out of your fabric until it is damp and no longer drips.
Step 2: Set Up Your Dye Station

Cover your surface with a waterproof table cloth or tarp. I didn’t have a table big enough, so I am working directly on my floor! Set your wire rack inside the drip tray with at least one inch of space between the rack and the tray.

Scrunch up your fabric and set it on top of the tray. You can also do some shibori folds to make different patterns- check out our blog about shibori dyeing for some ideas!
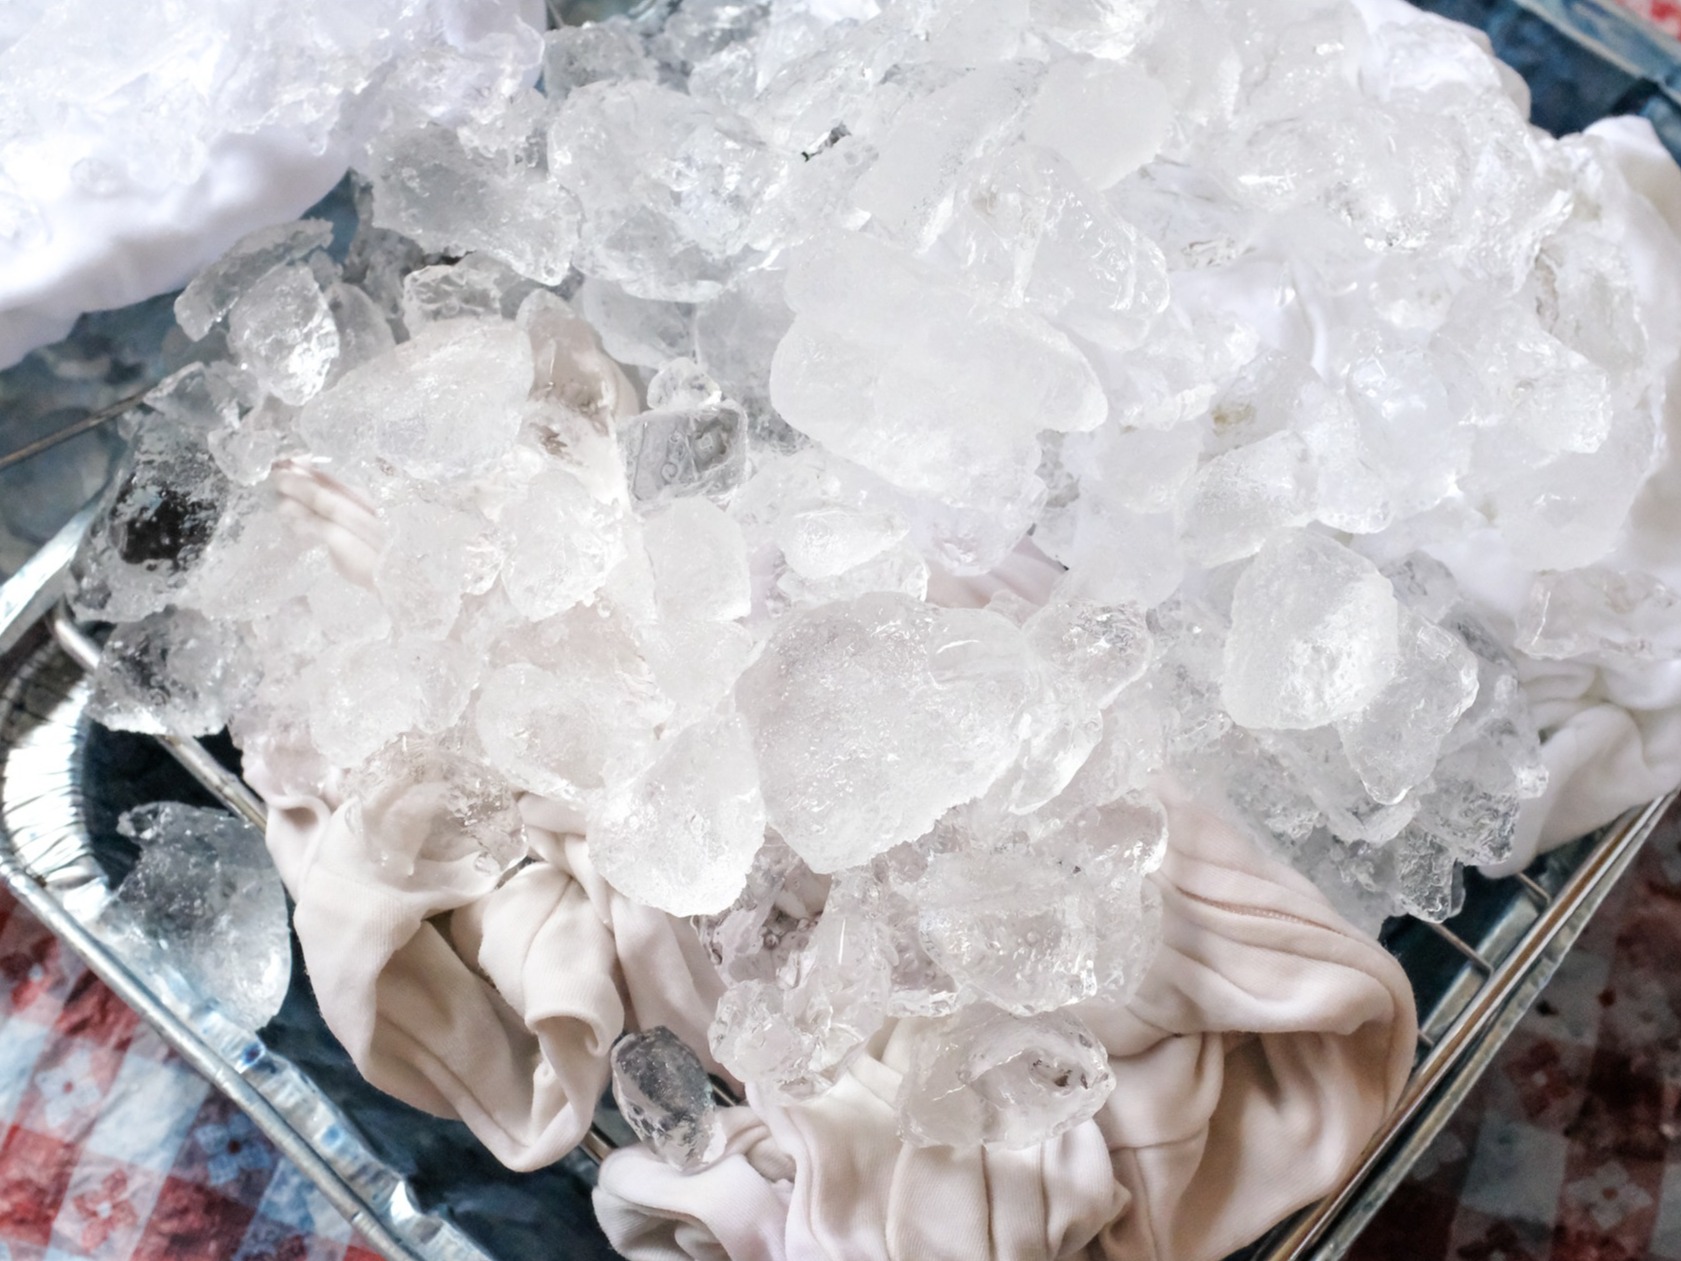
Cover your fabric entirely with ice and let it melt for a couple of minutes.
Step 3: Sprinkle Your Dye

Now comes the fun part! With your spoon, sprinkle small amounts (less than ¼ teaspoon) of dye all over the ice.
For a more minimal/lighter look, use less. For more vibrant, richer colors, use more!

Try not to mix the colors on top of the ice- as the ice melts, it may turn a muddy brown.
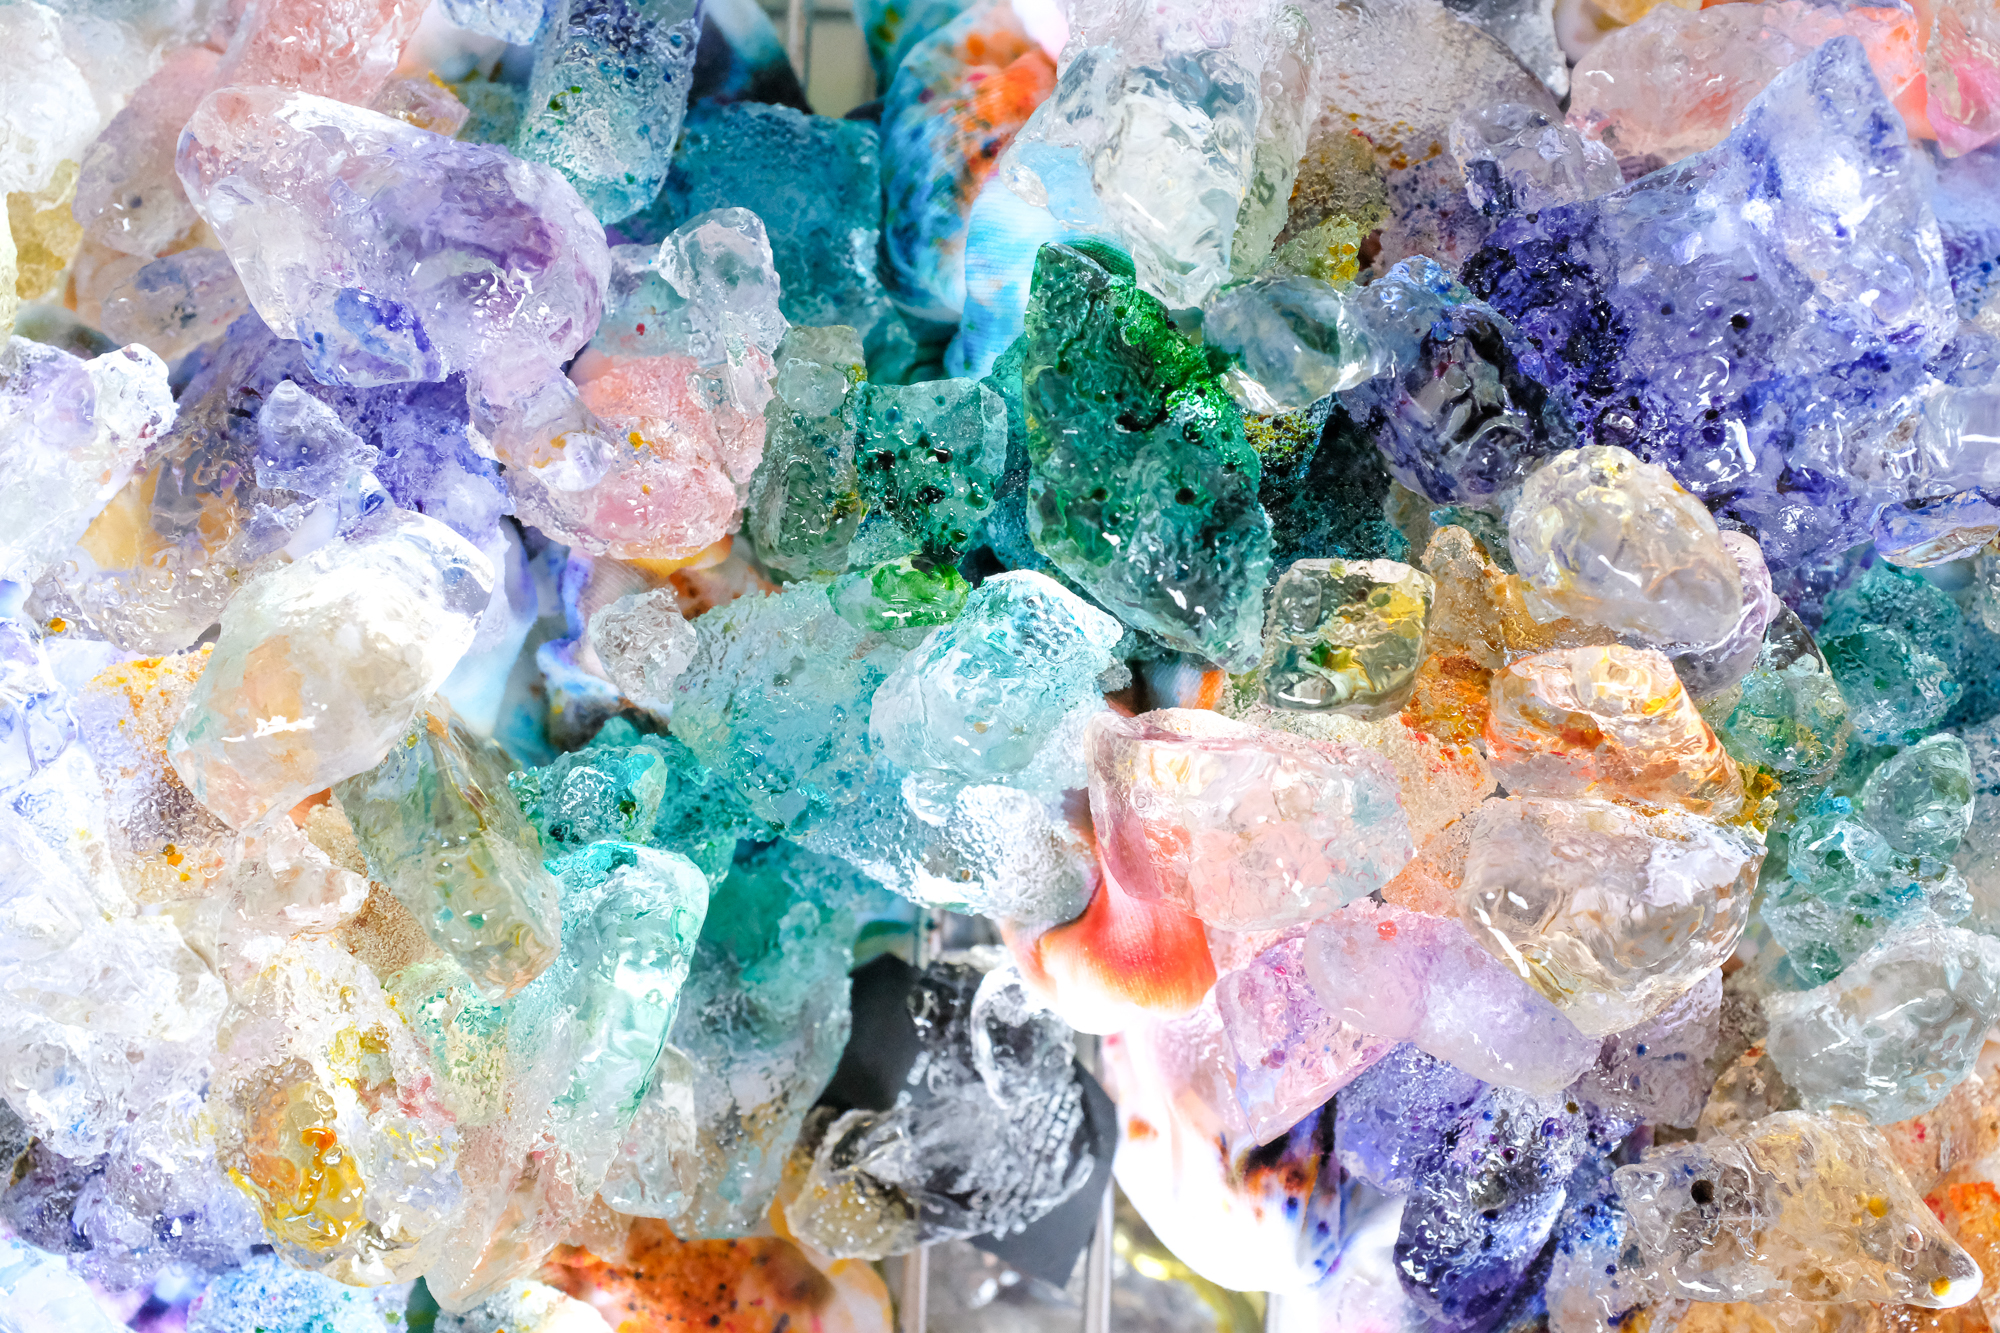
I sprinkled small sections of my ice with dye to test out each dye color.
Step 4: Let It Rest

Let the ice melt and the dye set for 24 hours. Don’t skip this step! If you rinse early, the colors will wash out.
Once 24 hours have passed, rinse out your fabric until the water runs clear. Wash and dry your pieces separately the first time; then, you’re good to go!
Step 5: Rock Your New Clothes!
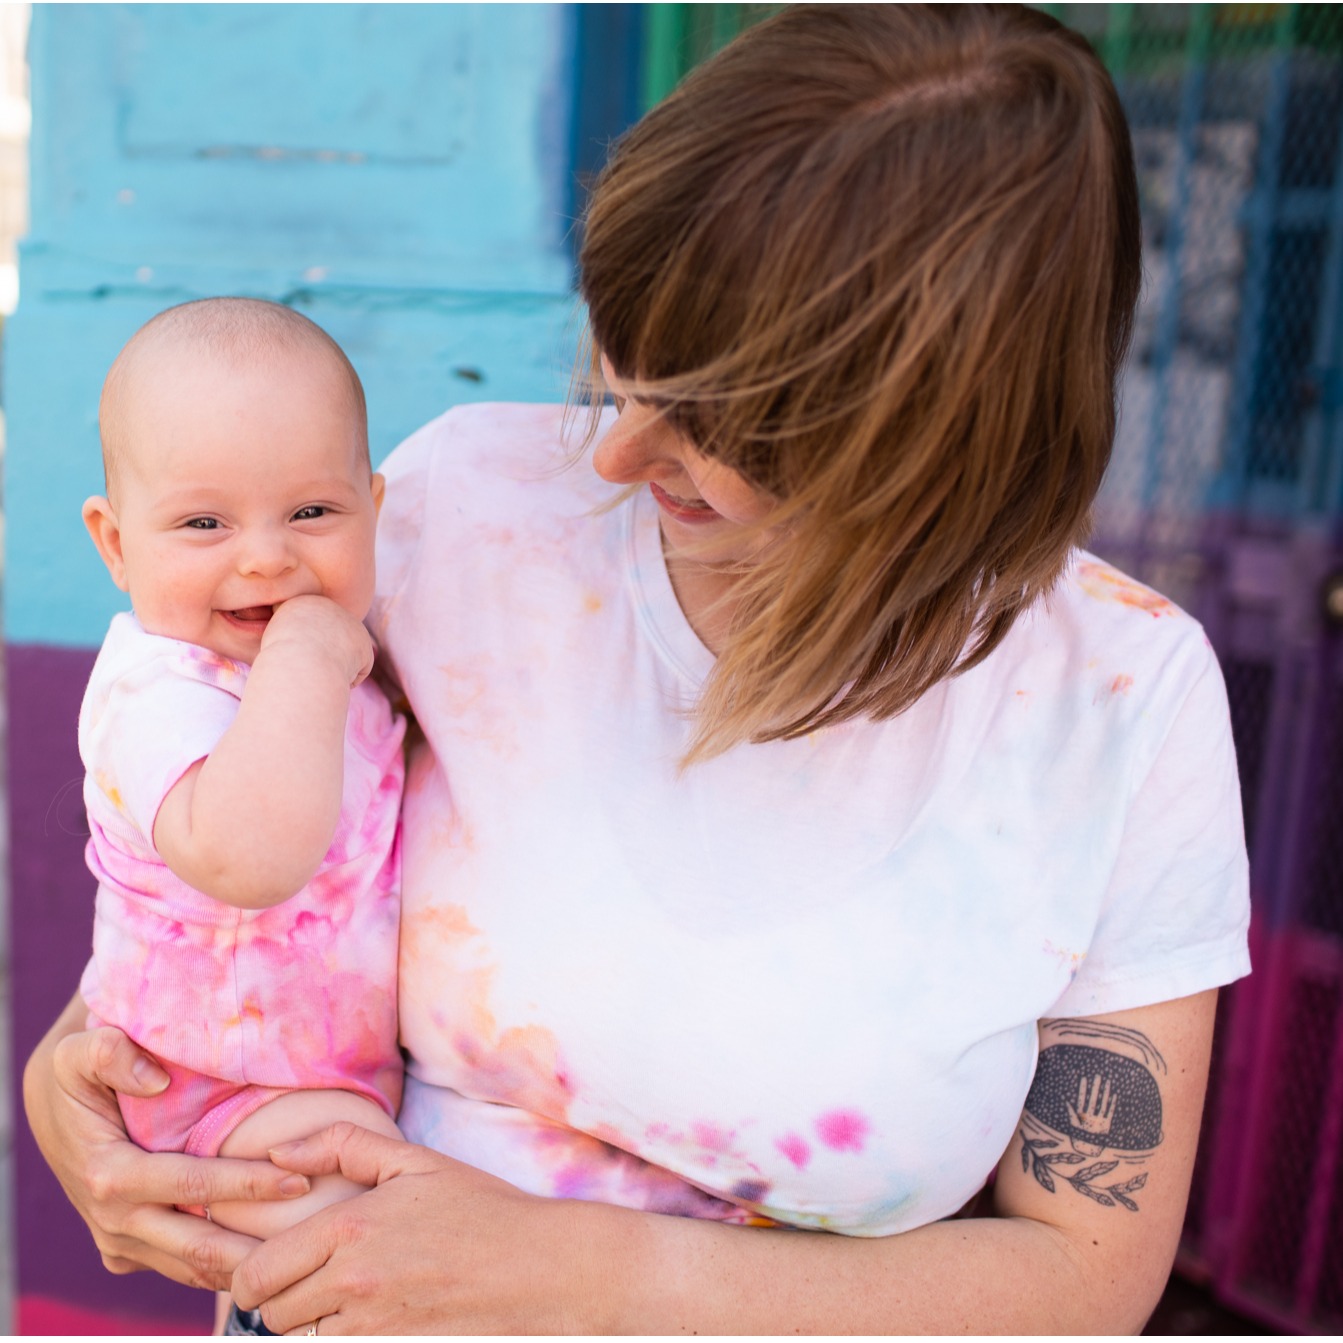
I’m so proud of my projects! My daughter and I are thrilled with our matching ice dyed outfits! There is plenty of dye left in my kits, so I’m planning to revive more old tees and ice dye my bedsheets.


We love all things dye at Jenny Lemons! Want to learn more about dyeing?
Check out our selection of dyeing supplies and kits and sign up for an upcoming workshop!
Follow OodleBaDoodle on Instagram, check out Anna Joyce’s book Hand Dyed, and take a visit to Dharma Trading Co in San Rafael, California.
Have you tried ice dye? Share your projects in our comments!

JENNIE LENNICK
Designer, entrepreneur, and lover of crafts! Boss Lady at Jenny Lemons in San Francisco


