


You Can Crochet a Mushroom!
Crochet a Cute Mushroom!
By Twinkie Chan
Learn how to crochet a mushroom with this step-by-step tutorial and stitch guide. We hope you enjoy this free crochet pattern that is perfect for intermediate crocheters!
Who’s Ready to Have Some Fun-gi?
For anyone dreaming of living in a colorful mushroom forest (who isn’t??), I’ll show you how to crochet a super adorable baby mushroom.
I’m Twinkie Chan, a San Francisco-based designer and author of 2 crochet books. I’ve been crocheting since I was 10, and I started designing in 2005, with a dozen whimsical food-themed scarves like cupcakes, buttered toast, green salad, and bacon and eggs. I love encouraging people to have fun with their fashion and their crafting.
This project is fairly easy for an advanced beginner. You should be familiar with crochet techniques like working in the round, working in back loops, working front post stitches, and reading a crochet pattern. The finished size is approximately 4 ¼ inches tall x 2 ½ inches wide.
Gather Your Materials
- 8 yards worsted weight yarn in a color for the mushroom cap (noted in the pattern as Cap Color), like Lion Brand Vanna’s Choice in Grapefruit
- 17 yards worsted weight yarn in a color for the mushroom stem (noted in the pattern as Stem Color), like Lion Brand Vanna’s Choice in White
- H8/5.00mm crochet hook, or whatever feels comfortable for you with worsted weight yarn
- Scissors
- Yarn or tapestry needle
- Stitch marker or piece of contrasting yarn
- Polyfil stuffing

As an Amazon Associate we earn from qualifying purchases. Thank you for checking out our recommendations!
Stitch Refresher
fpdc: front post double crochet – This is a double crochet stitch worked around the entire post of a stitch in the rnd below, rather than into the top of the stitch. This pushes the stitch out and toward you to create a 3D texture. To begin, YO and insert your hook around the post of the stitch below, from front to back and then out the front again, YO and pull through 1 loop, YO and pull through 2 loops, YO and pull through 2 loops.
inv dec: invisible decrease – Insert hook in FLO of next st, then insert hook into FLO of the following st, YO, pull through 1st 2 loops, YO, pull through remaining 2 loops.
Note: The RS of your work should always show on the outside of the mushroom.
Step 1: Crochet the Top of the Mushroom Cap

With the Cap Color, make a magic circle, or ch 3 and sl st to 1st ch to form a small ring.
Rnd 1: Ch 1, 6 sc into ring. Don’t join rnds. Use a stitch marker if needed. – 6 sts
Rnd 2: (2 sc) 6 times. – 12 sts
Rnd 3: [(2 sc), sc] 6 times. – 18 sts
Rnd 4: [(2 sc), 5 sc] 3 times. – 21 sts
Rnd 5: [(2 sc), 6 sc] 3 times. – 24 sts
Rnds 6-7: Sc evenly around. – 24 sts
Work 4 more sc evenly, then sl st. Break off. Weave in both ends. With Stem Color and tapestry needle, decorate the cap with French knots. I make my knots with 4 wraps around the needle. Click here for a French knot tutorial.
You can also use groups of 2-3 very short embroidery stitches to create small spots. Or glue on small white pom poms or pieces of white felt. It’s all up to you!
The back of your work can look messy because this will be hidden inside the mushroom.
Step 2: Crochet the Bottom of the Mushroom Cap

Rnd 4 might look a little bit confusing, but the front post stitches help create a fun texture that represents the gills of the mushroom cap. If this feels too overwhelming, you can crochet a plain, flat bottom. That alternate pattern for Rnd 4 will be given below.
With Stem Color, make a magic circle, or ch 3 and sl st to 1st ch to form a small ring.
Rnd 1: Ch 1, 6 sc into ring. Sl st (not too tightly) to 1st sc to join. Even though you’re joining rnds, you might still want to use a stitch marker for Step 2. – 6 sts
The joining sl sts at the end of Rnds 1-3 should lie right on top of the 1st st of the rnd, essentially replacing it. This also means that the 1st (2 sc) of Rnds 2-3 will be worked into the 2nd st of the previous rnd. This is important so that your front post stitches in Rnd 4 will begin in the right place.
Rnd 2: Ch 1, (2 sc) 6 times. Sl st to 1st sc to join. – 12 sts
Rnd 3: Ch 1, [(2 sc), sc] 6 times. Sl st to 1st sc to join. – 18 sts
Rnd 4: Ch 1, fpdc in 1st sc from 2 rnds below, sc in 1st st of the current rnd (which will actually be the 2nd sc of Rnd 3), fpdc in next sc from 2 rnds below, don’t sk a st in the current rnd and work sc. [Fpdc in next sc from 2 rnds below, sk 1 st in the current rnd and sc in the next st, fpdc in next sc from 2 rnds below, don’t sk a st, sc in the current rnd] 5 times. Sl st to 1st fpdc to join. – 24 sts
Alternate Rnd 4: Ch 1, [(2 sc), 2 sc] 6 times. Sl st to 1st sc to join. – 24 sts
Break off leaving 18 inches of yarn for sewing later. Weave in other end.

Optional: cut a circle of heavyweight interfacing slightly smaller than the bottom of the mushroom cap and glue it to the WS or back of the cap.
Step 3: Crochet The Stem
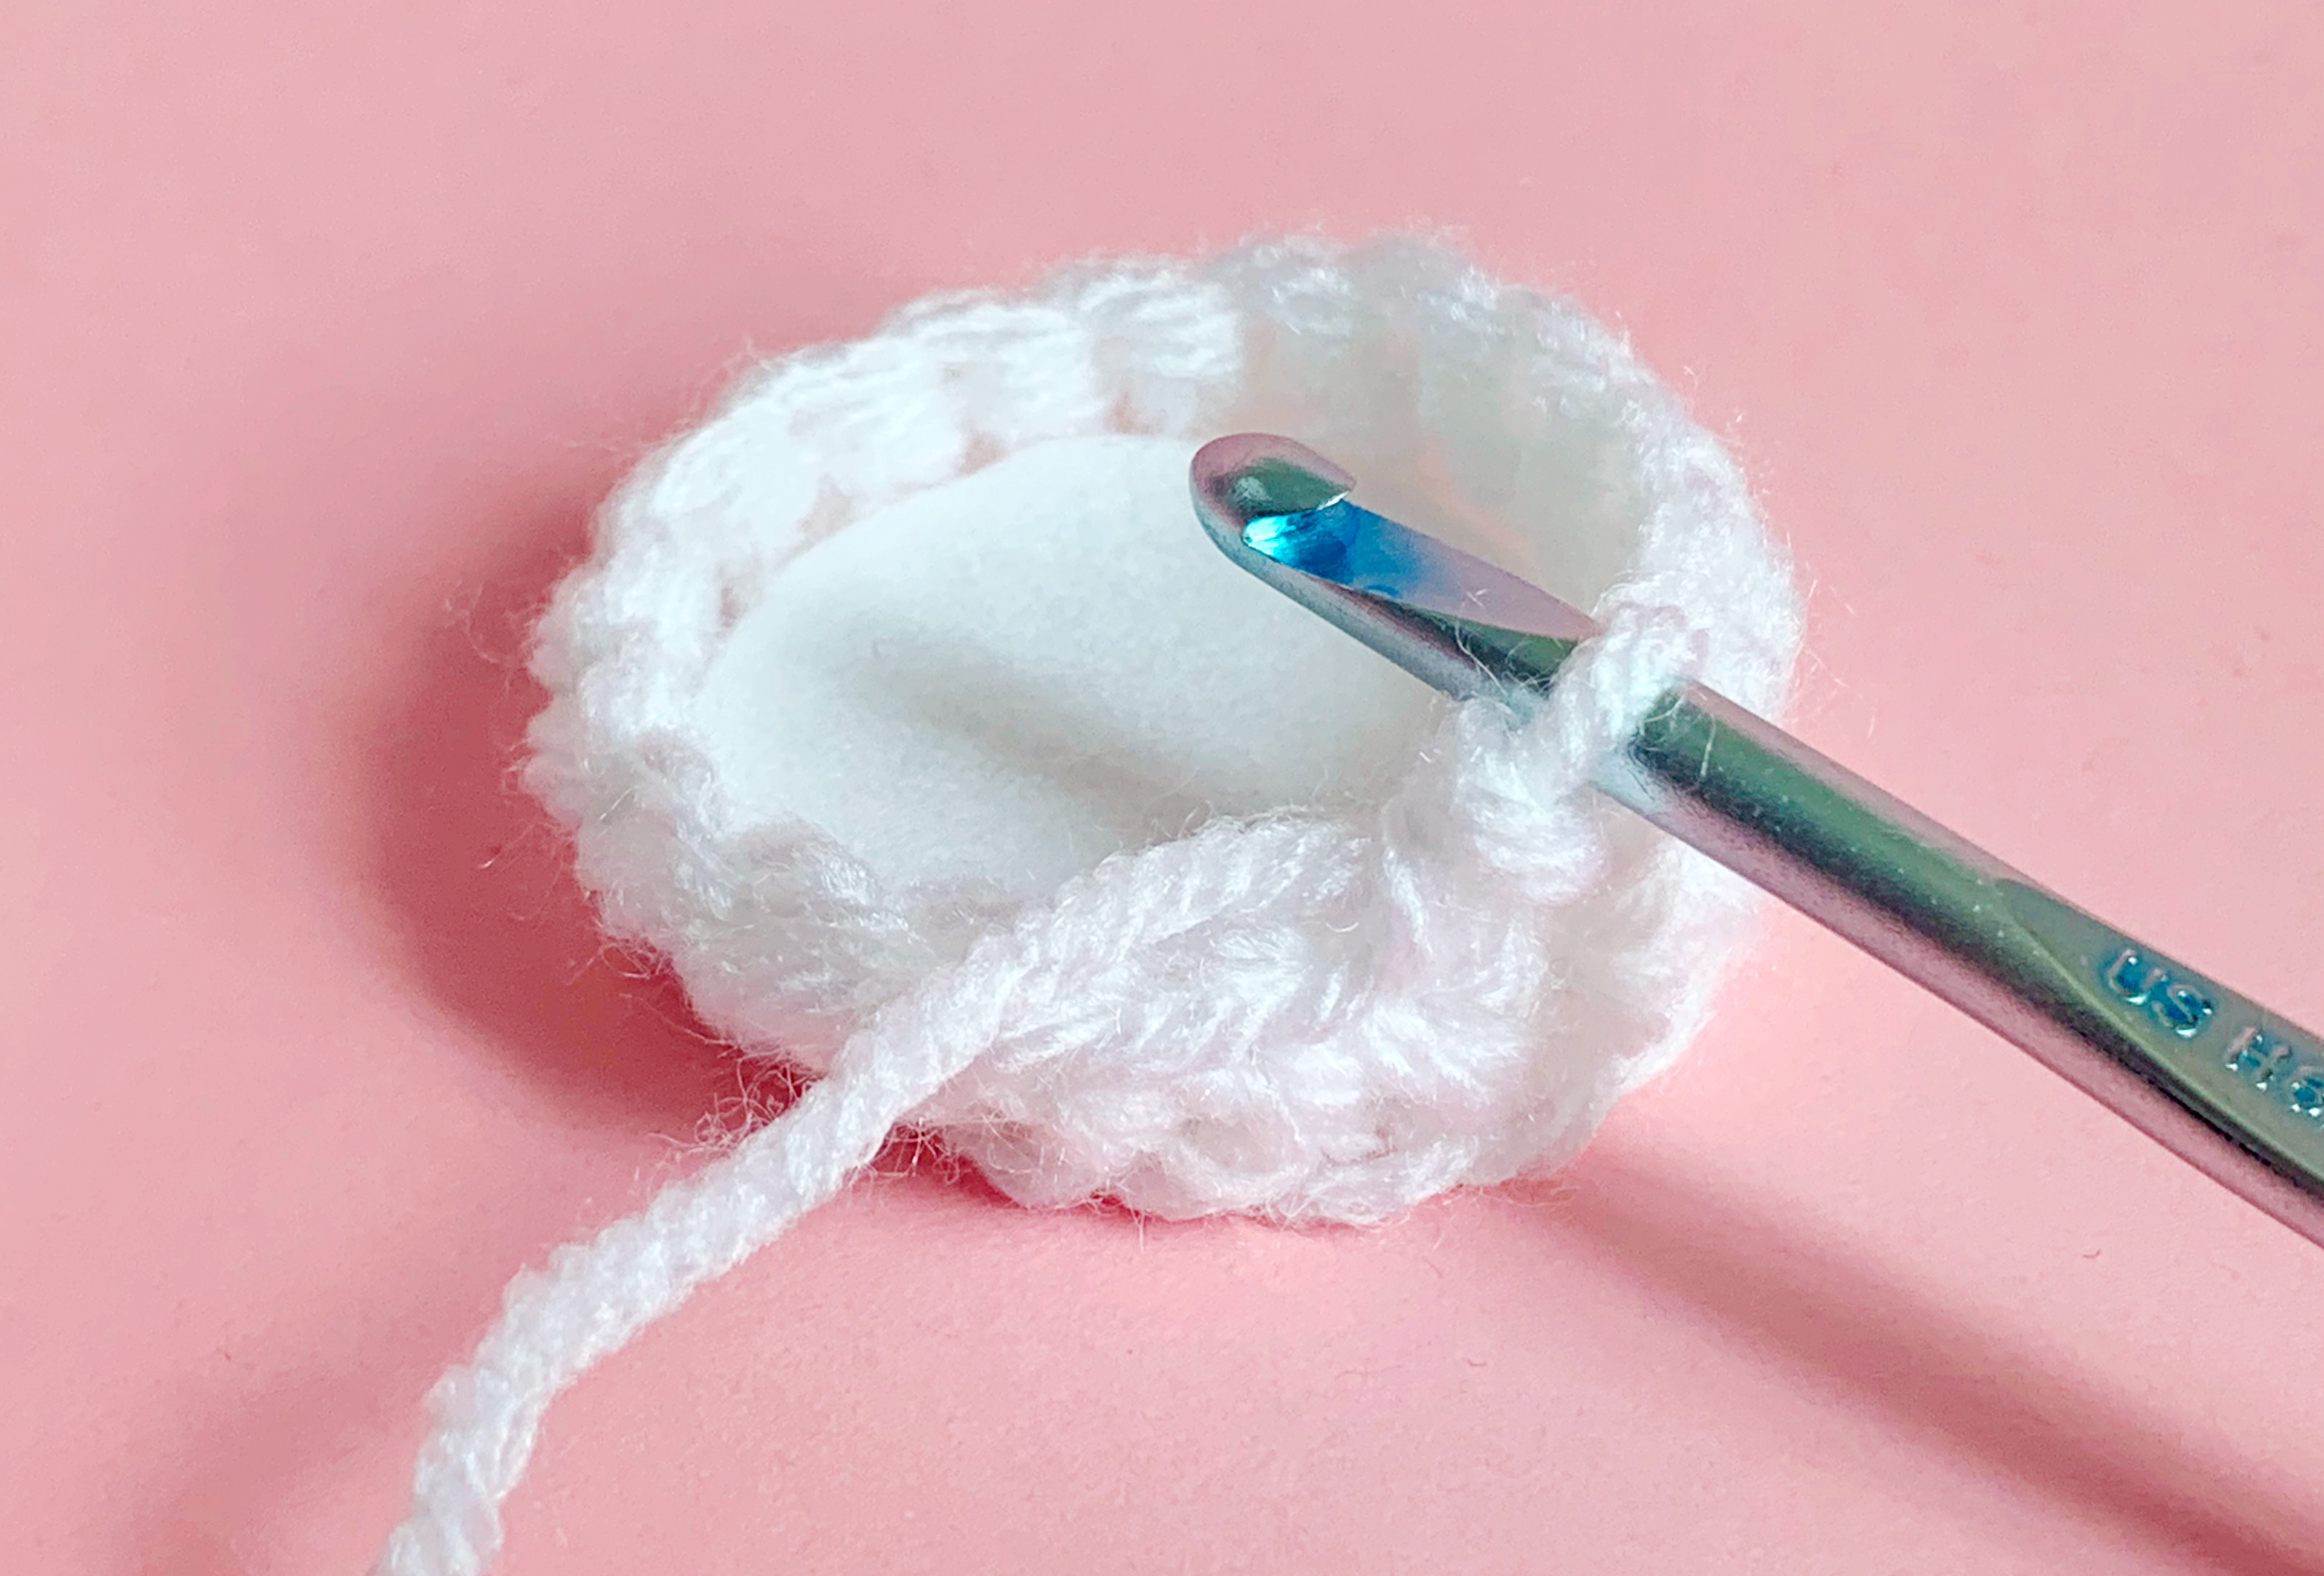
You’ll start crocheting the stem at the bottom and work your way to the top.
With Stem Color, make a magic circle, or ch 3 and sl st to 1st ch to form a small ring.
Rnd 1: Ch 1, 6 sc into ring. Don’t join. Use a stitch marker. – 6 sts
Rnd 2: (2 sc) 6 times. – 12 sts
Rnd 3: [(2 sc), sc] 6 times. – 18 sts
This is the bottom of your mushroom. Don’t break off yet, but trim or weave in the beginning yarn tail.
Optional: For a flatter bottom on the stem, sl st to next st to join. Cut a circle of heavyweight interfacing slightly smaller than the circle you just crocheted and glue it to the WS. Wait a few minutes for this to dry before continuing.
Rnd 4: For a flatter bottom, work Rnd 4 in BLO. For a rounder bottom with no interfacing, continue to work in both loops. 18 sc evenly around. Don’t join. – 18 sts
Rnds 5-6: In both loops, 18 sc evenly around as you start working your way up the stem. – 18 sts
Rnd 7: [inv dec, 4 sc] 3 times. – 15 sts
Rnd 8: [inv dec, sc] 5 times. – 10 sts
Start stuffing Stem with Polyfil and continue to stuff every 2-3 rnds until Stem is finished. If you find it difficult to stuff through a small opening, the eraser end of a pencil is helpful.
For Rnds 9, 10, and 13, you can work the inv dec anywhere in the rnd. If the decrease is always the first st of the round, your Stem may lean more in one direction than if you always change up the place of the decrease. It can be something fun to play around with, but I’m totally ok with a mushroom that has a bit of a lean!
Rnd 9: inv dec, 8 sc. – 9 sts
Rnd 10: inv dec, 7 sc – 8 sts
Rnds 11-12: 8 sc evenly around. – 8 sts
Rnd 13: inv dec, 6 sc. – 7 sts
Rnd 14: sc evenly around. – 7 sts
Sl st to next st to join. Break off leaving approx. 12 inches of yarn for sewing later.


Optional: for an even flatter and more stable bottom, re-join Stem Color at the bottom of the Stem, into the free front loops of Rnd 4. Orient your hook and the Stem so that the WS of your stitches will show on the outside. Work 1 sc in each free loop around - 18 sts. Sl st to 1st sc to join. Break off and weave in both ends.
Step 4: Time to Assemble the Mushroom!

Put some stuffing into top of the mushroom cap. You can add more later.
With the yarn tail from bottom of the mushroom cap, whipstitch the 2 pieces together, making sure the RS of both pieces shows on the outside. I whipstitch through both loops of cap bottom and the back loop only of cap top, but you can seam however you prefer.
It’s a good idea to add a bit more stuffing before you’ve finished seaming to fully fill out the shape of the cap. If you didn’t use any interfacing, be careful not to overstuff, or else the bottom of the cap will become a bit rounded. When you’ve finished seaming, tie off your yarn and weave in the end.

Whipstitch the top of the stem to the center and bottom of the cap. Add in a bit more stuffing before you’ve finished seaming. Tie off your yarn and weave in the end.

And you're finished!
Enjoy your new mushroom friend! It'll look cute on your mantle, tucked in with your houseplants, as a Christmas ornament, or on a keychain. You can even dress it up with little eyes like Twinkie did here.
We love all things crochet and fiber arts at Jenny Lemons! Want to learn more?
Check out our selection of crochet supplies and kits and sign up for an upcoming workshop!
Have you tried this tutorial? Share your projects in our comments!

TWINKIE CHAN
Twinkie Chan is a SF-based fiber artist known for her colorful, food-themed, crocheted accessories like cupcake scarves and hamburger mitts. She has published two crochet books, has been featured multiple times in craft magazines like Simply Crochet, Mollie Makes, and Crochet Now. She is currently a full-time instructor, artist coach, and content editor at Creativebug. Follow her on Instagram!


