


How to Make a Fake Cake

Image Courtesy of Julie Nguyen
How to Make a Fake Cake
By Jennie Lennick
Making fake cakes is easy, fun, and super affordable! In this tutorial, I share my preferred artificial cake materials, how to frost a cake, how to decorate with a simple star shape pattern, and how to embellish your designs with fake fruit.
I am allergic to gluten, so I spend more time looking at cakes than eating them. I love to walk into a bakery and gaze at the beautiful cakes with their fluffy frostings and delicately swirled creams. I wish I could take one of those cakes home and stare at it forever.
Recently, I started seeing fake cakes pop up all over social media. Do other people enjoy cakes primarily for their aesthetic beauty? I feel seen!
Meet Fake Cakery
I am excited to introduce Julie Nguyen, the artist and professional baker behind the fake cake company Fake Cakery. Julie grew up with a passion for baking and began her culinary education and career as a baker at the age of thirteen. Her business specializes in producing realistic-looking fake cakes for home decor, photoshoot props, and food styling sets. She is currently pursuing a BFA in Film Production but works with other mediums, including foam, the base of Fake Cakery, which she runs whenever she isn't in the bakery or the classroom.
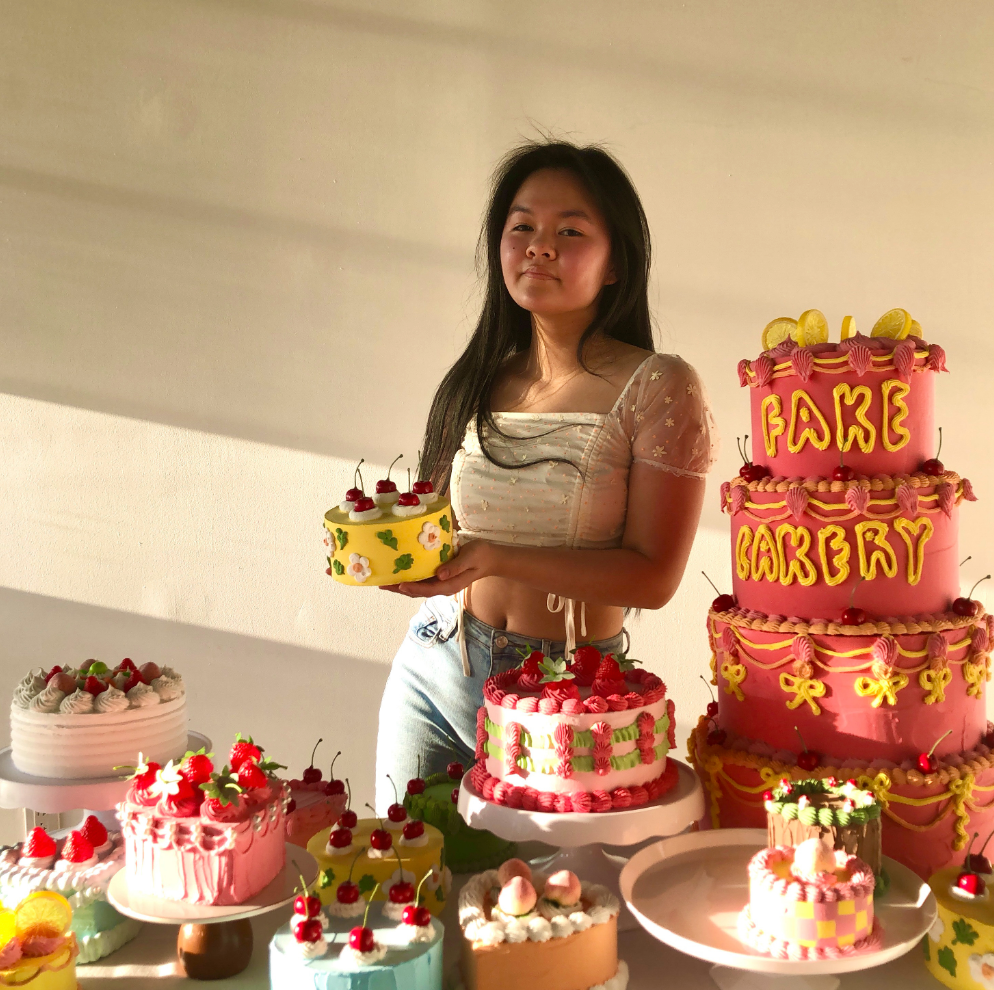
Julie Nguyen
Julie and I collaborated to create a DIY fake cake kit, which includes all the supplies you need to make a fake mini cake! I chronicle creating a fake cake using materials from our kit in this simple DIY.
In this tutorial, I cover the following:
- How to frost a fake cake with fake frosting.
- How to add color to your fake frosting.
- How to fill a piping bag.
- How to make a star design.
- Finishing touches for your cake.
This project is perfect for beginners! I'm so excited to share it with you!
Julie Nguyen
Materials List
-or-
- Round styrofoam cake dummy
- Fake fruits
- Lightweight spackling
- Pastry bag with a star tip and nozzle
- Acrylic Paint
- Palette knife
- Scissors

How To Make a Fake Cake: Step by Step Instructions
Step 1: Frost Your Cake


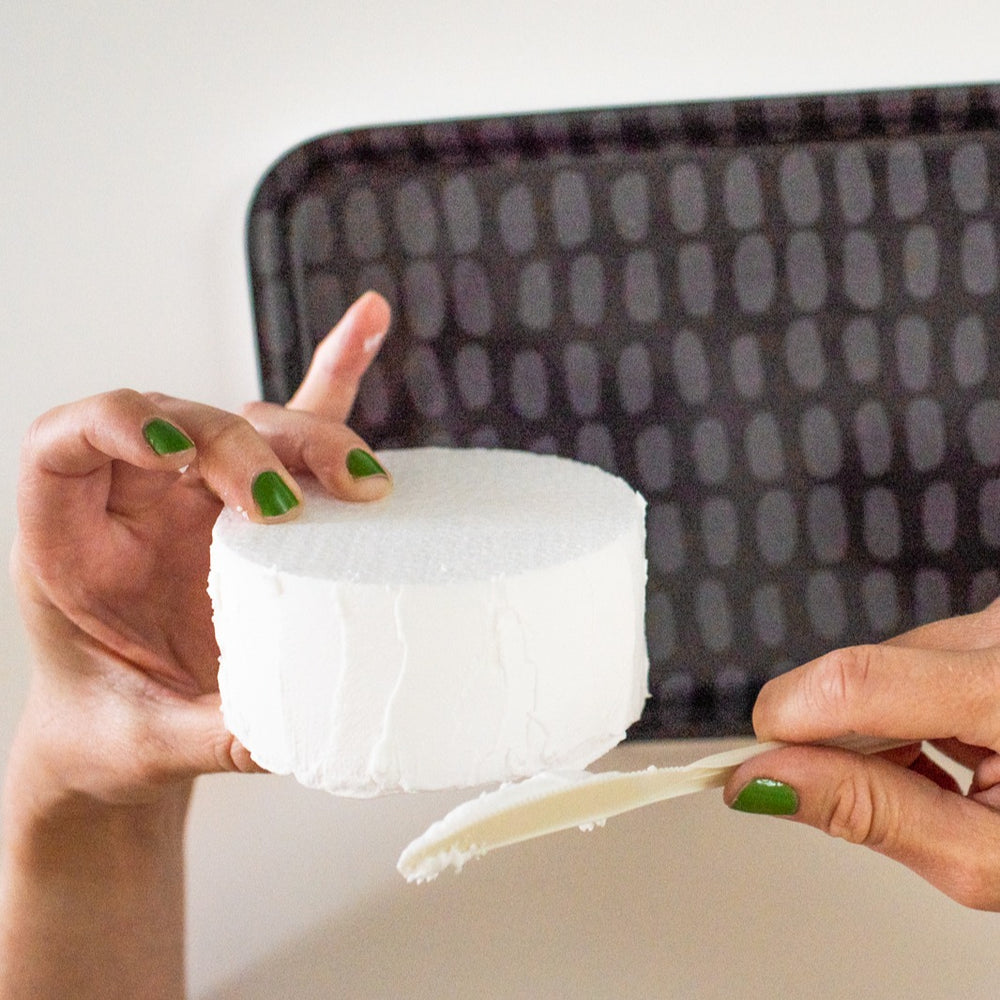

- Scoop some spackle onto your knife.
- Hold onto the top and bottom of your cake form and apply the spackle with your knife.
- Rotate the cake form to get an even coating around the side of the cylinder.
- Frost the top of your cake. I pinch the cake form between two fingers and as much of the top of the cake as I can.
- Once the top is almost entirely frosted, set your cake down and fill in the space your fingertips covered.
Allow your cake to dry before moving on to the next step. Depending on your environment, it may take 24-48 hours for the spackle to harden completely. You can speed up the process with a hairdryer but run the risk of cracking your cake.

Step 2: Add Color To Your Frosting


1. Scoop about 3/4 cup of spackle into a cup.
2. Add a squirt of paint to the spackle.
3. Stir until the color is uniform.

Step 3: Fill Your Pastry Bag


1. Open up a pastry bag by inserting your hand inside.
2. Insert the innermost part of your frosting nozzle into the bag.


3. Push the ring to the tip of the bag.
4. Open your bag and fold the sides down to create a cup shape.


5. Place your pastry bag into a glass. The glass will hold the bag while you fill it with spackle!
6. Scoop your colored spackle into your piping bag.


7. Push the spackle to the front of the bag. *Optional: tie a rubber band around the back of the bag to prevent leakage.
8. Cut off the tip of your bag with scissors.
9. Carefully place your star piping tip onto the end of your bag and screw the plastic ring of the nozzle over the tip to secure it in place.

Step 4: Make A Star Design


1. Hold the pastry bag upright vertically over your cake.
2. Start squeezing your pastry bag with the tip hovering above the surface of your cake. Squeeze until a puff of cream forms. Press down slightly and pull straight up. It should look like a star shape from above.


3. Repeat this process around the entire perimeter and the base of your cake.


4. Hold your pastry bag straight in the air and squeeze a large amount of spackle onto the center of your cake.
5. Stop squeezing, press down slightly, and lift off while twisting. You will have a spiral star shape.
Step 5: Finishing Touches

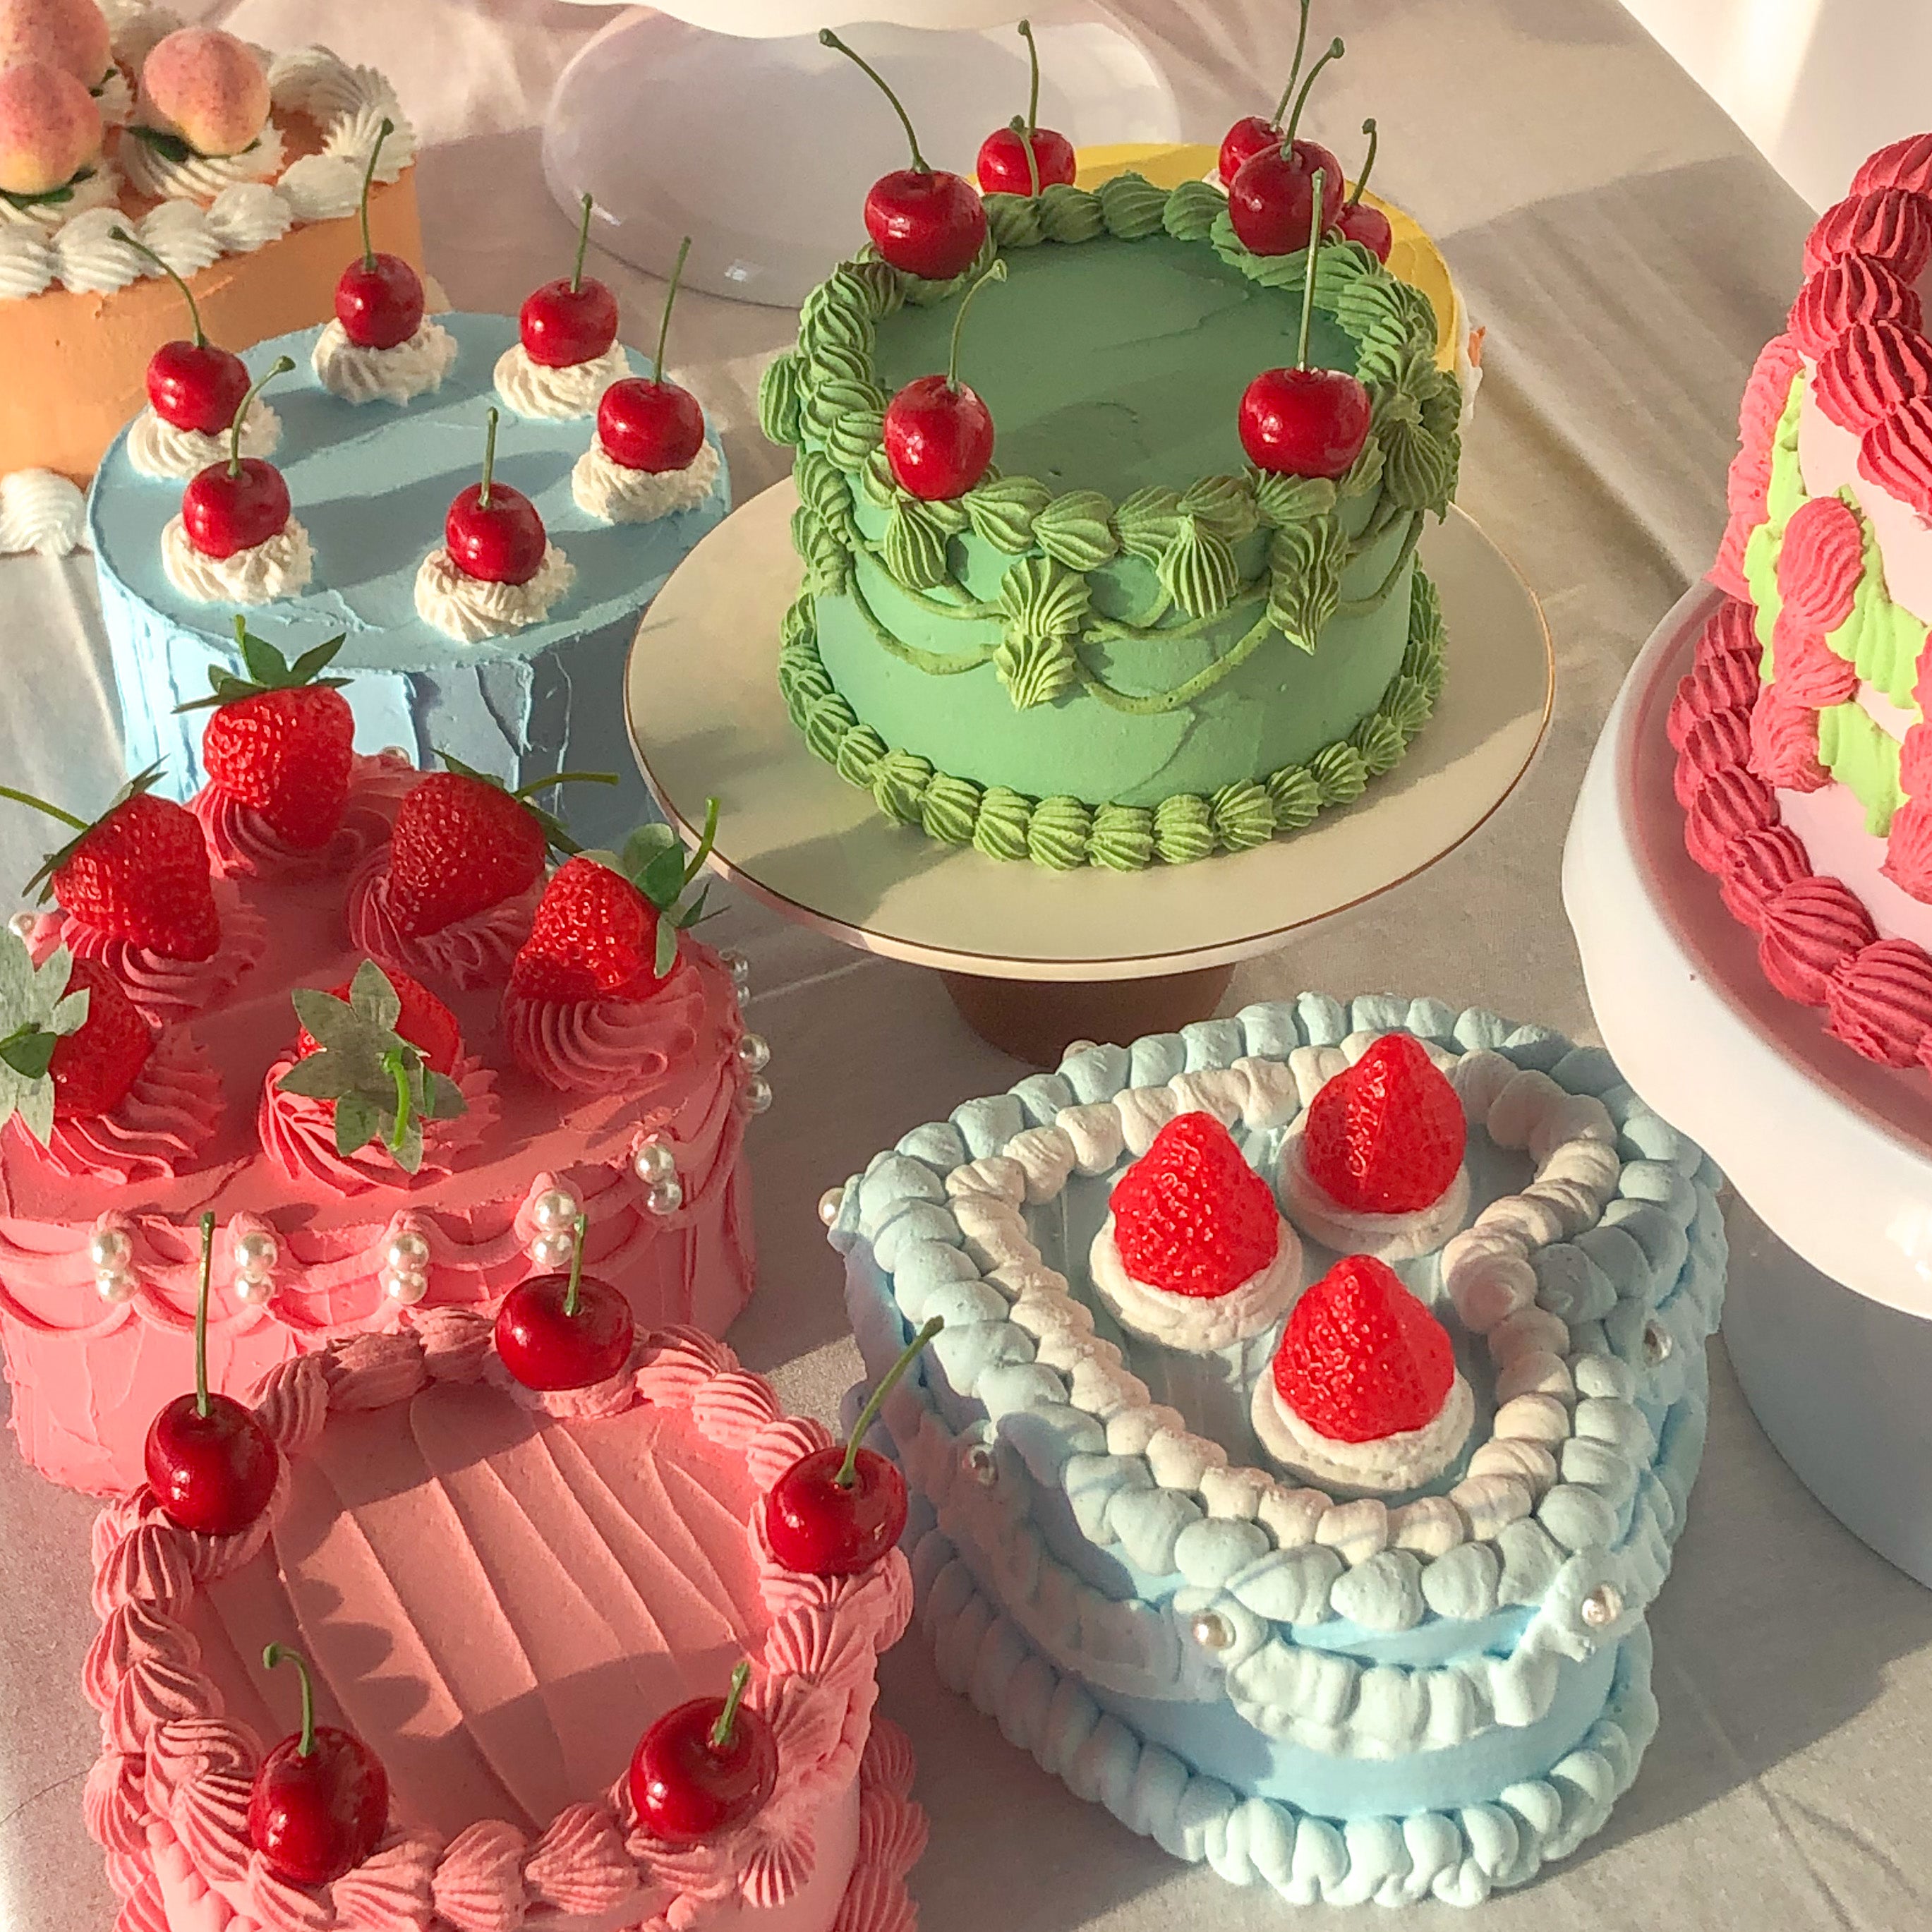
Add fake fruit, vintage charms, glitter, or other decorations to your cake! I love these realistic-looking cherries! You can also add actual cake decorations to your fake cake, like candles, cake toppers, or faux flowers. Tip: instead of using real sprinkles on your fake cake, make them out of polymer clay or buy them here! Candy sprinkles will melt when they touch the wet fake frosting. Trust me, I've made this mistake!
I can't wait to decorate my bookshelves with fake cakes! They are so lightweight you can add a magnet to the back and stick them to a fridge or locker.
These fake cakes will last forever and are durable, but be careful when cleaning them. Spackle is dissolvable in water, so dust them with a dry rag vs. a wet cloth to prevent damage.
Fake Cake Craft Kit
Learn cake-decorating techniques with this fun kit! Made in collaboration with Julie Nguyen of Fake Cakery, this kit includes everything you need to build an adorable fake cake from start to finish. No need to worry about collecting tons of supplies from different places- all you need is inside the box!

Julie Nguyen
Want some decorating inspiration? Check out my Pinterest board full of amazingly decorated fake cakes! I compiled a bunch of fun ideas there!
Did you make a fake cake or try out our best-selling Fake Cake Craft Kit? Share your experience in our comments! Happy Crafting!
By: Jennie Lennick
Designer, entrepreneur, and lover of crafts!
Boss Lady at Jenny Lemons in San Francisco.

1 comment
-
What kind of spackle do you use and does it crack?
Kathy on


