


Painting Starry Skies And Galaxies With Watercolors
Celestial Watercolor
by Vica Lew
When I first started painting with watercolors,
I found it an intimidating process because of how unpredictable it can be. I caught myself often fighting with the paint and the water, and getting frustrated because I couldn’t make a “perfect” piece. Creating starry skies and galaxies became a way for me to embrace this medium’s unpredictability and enjoy the lovely chaos that emerged on the paper. I hope you’ll have fun trying this little project! I encourage you to let loose with the paint and trust the water and the medium to do most of the work.
Gather Your Materials
- Watercolor paint
- Watercolor paper
- Fluffy round brush
- Painters tape or washi tape
- Palette
- Paper towels
- Water
- Scissors
- Pencil
- Gel pen
- Hairdryer (optional)

Shop Watercolor Supplies


Step 1: Prep Your Paper

Use painters tape to secure your watercolor paper onto your table or any other solid surface (approximately 1/4 inch along all the edges).
Tip: To minimize the risk of tearing your paper when you peel off the tape later, briefly (1 to 2 seconds) allow the sticky side to come in contact with your jeans or the fabric of your clothes to remove excess tackiness.
Step 2: Create a Mask
Stick 2 to 3 rows of painters tape onto the table or any other solid surface (depending on the size of your design). Make sure that each new row overlaps with the previous row so the water won’t seep through.

Draw your design onto the tape. Remember that whatever you draw here will stay white in the finished piece because it will protect the paper from the watercolor.
Once you’re happy with the design, peel the tape from the surface (make sure you peel it away as one piece instead of 3 separate rows), and cut out your shape.
Stick your mask onto the section of the paper that you’d like to protect from the paint.

Step 3: Let the Painting Begin!
We will be using a wet-on-wet watercolor technique for the first layer of the piece. Using your brush, apply a thin layer of clean water onto the whole sheet of paper. If too much water starts to pool around the corners, take a paper towel, and lightly dab away the excess water. We want just enough water for the paint to flow and move, but not too much that it will soak through the tape.
 Starting with the lightest color, gently touch your brush against the paper and let the paint move and flow independently. Do this repeatedly until several sections of the paper have the paint.
 Do the same for the other colors, and don’t be afraid to let the colors meet and blend. Leave some sections of the paper white, but paint should cover most of the sheet. Allow this layer to dry until it’s no longer wet to the touch.
Tips:
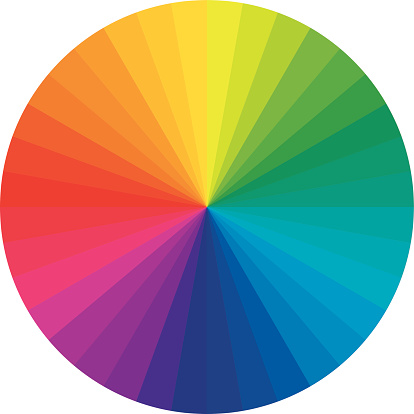
- A quick way to decide which paint colors to use is to pick three next to each other on the color wheel. These three colors make up an analogous color scheme and can help create a more harmonious looking piece. You can experiment with different kinds of color schemes as well.
- Using a hairdryer on a low setting for 10 to 15 seconds for each layer will help speed up the drying process.
Step 4: Building Up the Layers
 Build up the depth by adding more layers of the paint. You can use the watercolor on its own for more intense color or choose to add a small amount of water to the paint to help it move on the page. Use your brush to create a variation of swirly/cloud-like shapes, and allow the layer to dry before repeating for the third time.
 For the third layer, add a little bit of black paint to the different colors, and repeat the process. Remember not to cover the entire paper with this layer of paint. Allow sections of the previous layers to peek through. You can also choose to add more layers after this to build more depth and intensity, remembering to let the last layer dry completely before adding to it.
Step 5: Let’s Add Details!
When you’re happy with the number of layers you have, peel off the tape gently to reveal the white paper underneath (I like to peel away from me). Use your white gel pen to add stars and dots of varying sizes, and you can add other details to your masked piece.


SHOP YAY! IT'S VICA


Vica Lew
Vica Lew is an illustrator, maker, and musician based in San Francisco, California. She spreads smiles and silliness through her cute art, stickers, and adorkable handmade goodies through her shop, Yay! It’s Vica.


