


Make this Shibori Dyed Loungewear Set
Indigo Dreams
By Jennie Lennick
Learn indigo shibori techniques to dye fabric for DIY sewing projects!
Shibori is the ancient art of folding and binding fabric to create patterns for dyeing with indigo. This free tutorial will teach you how to use an indigo kit, maintain an indigo dye vat, and tie-dye linen fabric for sewing. This post includes links to free shibori and sewing patterns.
This post was created in partnership with Jacquard Products.
The Perfect Beginner's Indigo Shibori Kit

Jacquard’s Indigo Tie Dye Kit’s value is unparalleled. For the price, you can dye up to 16 yards of fabric (equivalent to approximately 16 tee-shirts), which is a lot more than most kits on the market.
Indigo dyeing is unlike any other tie-dye technique. With indigo, your results are nearly instant. You can try out different binding and folding techniques, dip it in the dye, let it oxidize, and open it up to see your patterns within minutes!
With indigo, you don’t have to worry about preparing your fabric in a soda ash solution before dyeing or heating the dye pot on the stove!
Indigo dyeing with the Jacquard kit is an almost effortless way to dye fabric. It is excellent for backyard projects and perfect for novice and advanced dye enthusiasts alike.

The Science Behind Jacquard’s Indigo Kit

The Jacquard kit contains a true indigo dye that is synthetically derived but chemically identical to natural indigo. In order for the pigment to bind to fabrics and combine in water, it needs to be mixed with a reducing chemical called Sodium Hydrosulfite.
Jacquard’s indigo pigment is pre-reduced 60%, which means they combined the indigo with Hydro and freeze-dried the mixture. To reactivate the dye, it needs to be added to water and mixed with a small amount of hydro.
Once you add hydro to the solution, the colorant blends with the water again. You can tell it’s soluble because the dye vat turns green, and It’s ready to be absorbed by your natural fiber fabric!

When the fibers are saturated with the dye solution and exposed to the air, the indigo pigment particles oxidize, turning blue and permanently changing the fabric’s color.
The fabric parts hidden from the air will remain white because the necessary oxidization did not occur. Because of this chemical reaction, shibori, the Japanese art of folding and binding fibers, is easy to achieve dramatic results.
Making Your Indigo Vat Last

Without any intervention, your vat will be usable for about two weeks. You can refresh your vat by adding more hydro and more indigo. The amount of dye and hydro you need to add to the vat is more art than science. You can tell your vat is no longer active if the water is blue- it has oxidized. Stir in hydro until the solution turns green again, and it’s good to go!
The indigo pigment is exhausted as you dip more fabric in the solution, resulting in a paler blue final color. If you’d like more vibrant blue, add more indigo crystals as needed.
With a bit of love and attention, your vat can last for months!
How to Indigo Dye: Tips and Tricks
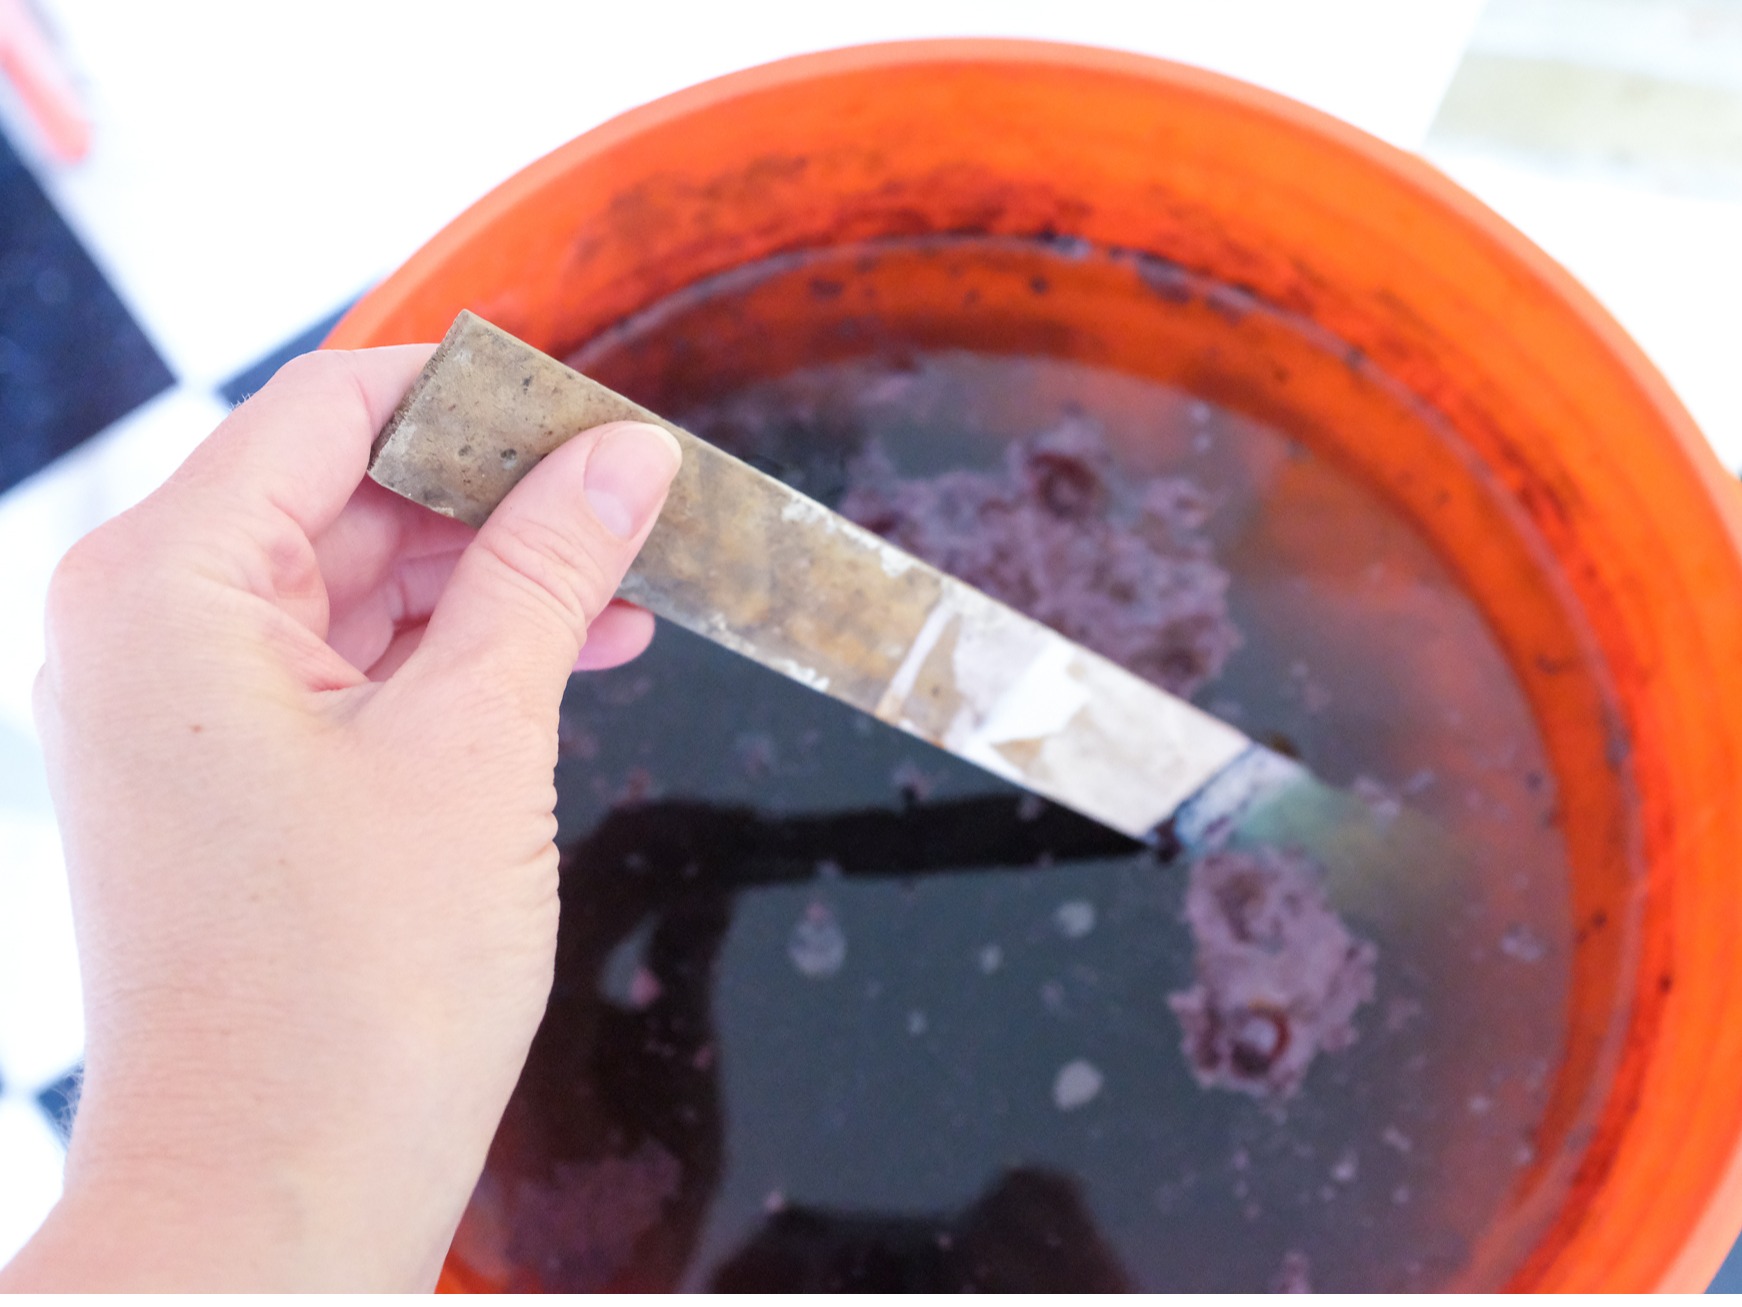
Assemble your vat by mixing indigo, hydro, and soda ash in a five-gallon bucket. Let your dye vat rest for a minimum of 20 minutes before you begin to dye. Set up your dye station in a well-ventilated area or outdoors- the chemicals can get stinky!

The process of indigo dyeing involves an oxidization period. Begin by submerging damp materials into your dye vat and gently agitate them while they’re under the solution’s surface. For my first dip in the vat, I keep my fabrics under for 2 minutes. As you pull your fabric out of the vat, you’ll notice it is not blue but green!

Allow it to oxidize for about 10 minutes or until it turns blue. To make your blues richer, dip your fabric again after oxidization. You do not need to soak it very long- just a minute or so. You just want to layer on more of the unoxidized solution.
Once you’re satisfied with your blues, rinse your fabric until it runs clear to stop the oxidization process.
Check out our blog about shibori for a myriad of folding and binding techniques!
Sewing With My Hand-Dyed Indigo Linen

I used my kit to dye two yards of white linen fabric. Dyeing linen with indigo is a total dream- the blues are so vibrant.
Pro tip- make sure to check the fiber content of your materials before dyeing them with indigo. It only works with natural fibers like linen, cotton, rayon, silk, or wool.
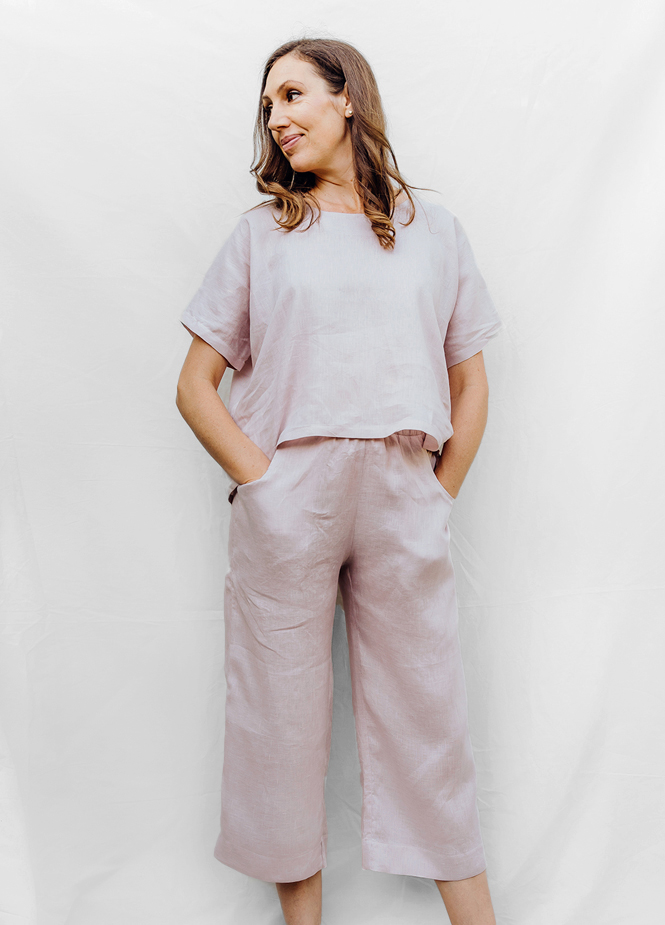
The Peppermint Loungewear Set
I've been daydreaming of making luxe loungewear from my shibori linen. I chose this pattern from Peppermint because it is free, and I like that the directions have choices for making pants or shorts.
Image courtesy of Peppermint
Peppermint is a fantastic resource for modern sewing patterns. They release various free patterns through their sewing school, all of which are simple to construct and designed by a selection of independent pattern designers. I had an almost effortless time sewing this set!
Pro tip: You are going to need to convert centimeters to inches to use the Imperial System. Peppermint is an Australian company and uses the metric system. I measured myself in centimeters to get my size but made the mistake of not purchasing enough fabric because I forgot to convert my meters to yards.


My Indigo Dyed Outfit

I loved creating this outfit from my hand-dyed linen. Dyeing yardage before cutting the fabric creates some exciting patterns where the seams meet. It’s a different look from dyeing the garment in its entirety.


My outfit is so fun! Yes, I made a set of pajamas, but I am thrilled to wear them in public! It’s perfect to pair with clogs, to wear as a beach coverup, or to laze around the house. The linen fabric heightens the outfit to feel a little more sophisticated than your average loungewear set.


Want to learn more about indigo and shibori dyeing? Check out our blog post all about shibori patterns!
For free and easy sewing patterns, check out Peppermint or Seamwork! I’ve made several patterns from both of these sources, and they are great!
For more indigo inspiration from Jacquard- check out this page!

JENNIE LENNICK
Designer, entrepreneur, and lover of crafts! Boss Lady at Jenny Lemons in San Francisco


