


The Swirling Colorful World of Marbling
Learn to Marble
By Jennie Lennick
Water Marbling Tutorial
Let's get colorful! I am a major fan of all things textile design. So when I discovered marbling, I fell head over heels with the swirling colors. After a bit of research, I was thrilled to learn how easy it is to do at home! In this tutorial, I'll show you how to do it!
Water marbling is a surface design technique that produces patterns resembling a swirled stone, like marble! To achieve this ancient craft, an artist drops watery paints on the surface of a syrupy liquid called size. Then, they manipulate the floating color with simple tools to create beautiful patterns.
In this blog tutorial, I dive into the whirling and colorful world of water marbling! I will cover how to pretreat materials with a mordant, how to prepare a carrageenan powder bath (called "size"), how to float inks on the surface of the bath, and how to make tools for agitating and swirling the colors. We will also go over how to float paints and create patterns.
Let’s begin!
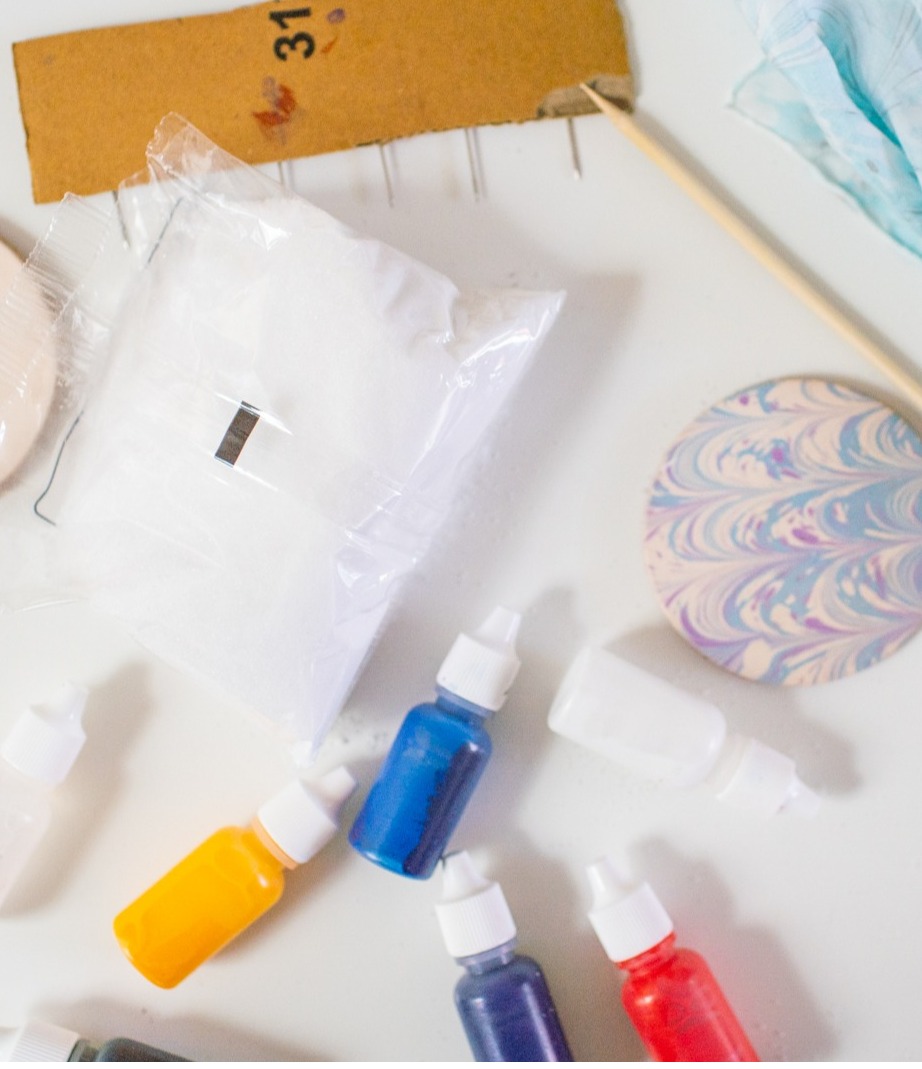
Gather Your Materials
-
Shallow tray
- Paintbrushes
- Eye droppers
- Cardboard
- T-pins or nails
- Tape
- Bucket or jar with lid
- Newsprint or paper towels
- Blender
- Sponge or spray bottle
- Water
Items to marble (fabric, paper, or leather)
-
Our marbling kit -OR-
- Carrageenan powder
- Marbling Paint
- Alum
As an Amazon Associate we earn from qualifying purchases. Thank you for checking out our recommendations!
SHOP MARBLING KITS

In this video, I go over how to marble with the Jacquard Marbling Starter Kit. It's super easy and fun to use!
Before We Begin:
Complete steps 1 and 2 the day before you start marbling for the best results. Fabrics like silk and cotton, paper, and leather work exceptionally well for marbling. You can marble any natural, flat surface.
Make sure that the items you wish to marble are smaller than your tray.
Step 1: Pretreat Your Materials with Alum

Everything you want to marble must be pretreated with a mordant to fix the paint to the material. For marbling, we use alum as our mordant. It allows the marbled design to adhere to the material quickly and permanently.
Mordant Recipe

Ingredients
- 2 tsp alum
- 1 quart water
Method
Combine the alum and water in a spray bottle. Spray all over the materials you wish to marble and allow to dry completely.
If your materials curl after drying, make sure to flatten them under heavy books. Similarly, if your fabric is wrinkly, iron it. It is essential to have flat materials to marble.
Alum will oxidize over time which kills its paint-adhering properties. If you have extra alum-soaked materials, store them in an airtight container.
Step 2: Make Your Size
We are using carrageenan (made from seaweed) to thicken our size.
Carrageenan Size Recipe

Ingredients
- 4 teaspoons carrageenan
- 1 gallon water
- blender
- bucket or large jar with lid
Method
I recommend using a blender to mix your size. Start by adding the carrageenan to about three cups of water. Blend until the mixture is smooth.Next, pour the mixture into a large bucket or bowl and add enough water to make a gallon. Allow your mixture to rest for at least 12 hours to make sure all air bubbles settle.
Carrageenan size is a natural material. You need to store leftover size in the refrigerator, or it will mold. The excess size will last for up to one month.
Step 3: Make A Rake!
Making a rake is fun and easy!
We need rakes to create our marbled patterns. They can be as straightforward or as complex as you’d like! For my rake, I simply taped some evenly spaced t-pins to a piece of cardboard. Experiment with different spacing of pins and sizes of rakes.

Step 4: Time to Marble!
Slowly pour your size (that has been resting for at least 12 hours) into your tray.


With an eyedropper, gently drop small bits of marbling paint all over the surface of your size.

Switch colors and add more paint with your eyedropper. Experiment with different methods of adding paint- try flicking paint with a paintbrush!

Once you’ve finished adding your paints, drag your rake slowly through the colors to create little arched patterns.

Pull your rake across the tray in another direction to continue marbling.

Use a stylus (like a stick or plastic needle) to continue to manipulate the colors.
Step 5: Transfer Your Design

Now that your beautiful marbled design is complete, let's transfer it to your material.

Carefully lay your material (silk, paper, etc.) on top of the size.

Gently pat your material with your fingers to make sure every bit of it touches the surface of the size.

Carefully peel your piece off of the size.
Step 6: Rinse & Dry

Very gently rinse off your print in a tray of clean water. The paint is not dry, so it is easy to rub it off.
Hang your work on a drying rack or from a clothesline to dry completely.
After each print, clean your size with newsprint or paper towels. Simply drag strips of paper across the surface until all the excess paint is soaked up.

Once you're completely done marbling, you can pour the excess size down the drain with hot water. It’s all-natural!
Tip: If you spill size, clean it up quickly! It is very slippery!

There are so many different patterns you can try with marbling. Indeed, the sky’s the limit! Test out different combinations of colors and mix them with a stylus or rake. I am so excited to experiment with various patterns on fabric swatches to use in a crazy quilt.
SHOP JENNY LEMONS


Want more fabric dyeing DIYS? Check out these tutorials!
- Make this Shibori Dyed Loungewear Set
- Ice Dye Adventures - DIY Tutorial
- Cyanotype Tutorial- Printing with the Sun
- Backyard Shibori Dyeing
This post was originally published on 5/18/2021 and updated on 6/20/2022. Thanks for visiting! You can check out more DIY projects on our blog here.

JENNIE LENNICK
Designer, entrepreneur, and lover of crafts! Boss Lady at Jenny Lemons in San Francisco
1 comment
-
Thanks a ton for sharing tips..Jennniii
Virpal singh on


