


Gluten Free Paper Mache
GLUTEN FREE Paper Mache
By Jennie Lennick
Gluten Free Paper Mache Tutorial
Check out my recipe for a gluten-free paper mache paste that works just as well as wheat flour. In this tutorial, I share my celiac-approved formula and how to DIY your own paper mache for sculptures, party decorations, and piñatas.

Years ago, I worked as a teacher leading second-graders in a weekly art class at an elementary school in San Francisco. I would drag my arts and crafts box to the gymnasium and lead a group of eager students in messy painting and sculpture projects. For my lesson plan one week, I decided to introduce paper mache.
Paper mache is an elementary craft that just about every American kid growing up in public school was required to do. It's so simple, make a sculpture out of cardboard and tinfoil, mix flour with some water and salt, dip strips of newspaper in your gooey solution, and smooth it all over your form. However, things get a little dicey for some kids (or some teachers) when you use flour in the classroom.
I was diagnosed with Celiac Disease in my early twenties and knew I had to avoid ingesting gluten at all costs, but I didn't think touching the gluten-laden flour would be a problem. Fifteen minutes into my paper mache demonstration, my skin started itching, and my hands broke out in hives. That night I nursed my blistered skin with ointments and vowed never to paper mache with wheat flour again in my life.
I did a little research and discovered many alternatives to using wheat flour for paper mache. You can use Modge Podge or Elmer's Art Paste mixed with water or a gluten-free, organic mixture.
This tutorial covers how to create a gluten-free paper mache paste made from cornstarch, salt, and water. It is just as effective as wheat flour and left me rash-free!
In this tutorial, I cover the following steps:
- How to create the inside of your sculpture using upcycled materials and trash.
- How to cut newspapers into strips for paper mache.
- How to mix your gluten-free paper mache paste.
- How to saturate newspaper strips and apply them to your sculpture body.
- How to paint and decorate your sculpture.
This project is perfect for anyone getting started with paper mache, not just gluten-free folks! I'm excited to share it! I encourage you to try using materials you already have at home.
Materials List
- Newspaper
- Corn Starch
- Salt
- Hot Water
- Small Bowl
- Whisk
- Scissors
- Acrylic Paint
- Paint Brush
- Tape
- Recycled materials like cardboard, bubble wrap, or tinfoil


Step 1: Cut Newspaper Strips

For my sculpture, I used about eight pieces of newspaper. Cut them into approximately 1-2 inch x 12-inch strips. You don't need to be too precious about it.


Step 2: Creature Your Sculpture Base

Construct your sculpture base from materials you already have at home. I am using some scrap bubble wrap, but you can use a myriad of other materials. Just take a trip to your recycling bin!
Some of my favorite materials for paper mache are:
- Tin Foil
- Bubble Wrap
- Cardboard
- Paper tubes
- Takeout containers
- Styrofoam

I am making a banana sculpture from bubble wrap. To start, form your material into a general banana shape.

Tape it together with packaging tape.

For more detailed parts of your sculpture, use thinner tape. I am using masking tape to form the stem of my banana.

Make sure your form is firm, and there are no loose or open areas.
Step 3: Gluten-Free Paper Mache Recipe
To make a gluten-free paper mache base, you will need:
- 1 cup corn starch
- 1 tablespoon salt
- hot water
- whisk or fork

Pour your corn starch into a small bowl.
Add salt. Don't skip this step! The salt prevents molding and preserves your project.


Add hot water. I poured it directly from my kettle into my mixture.
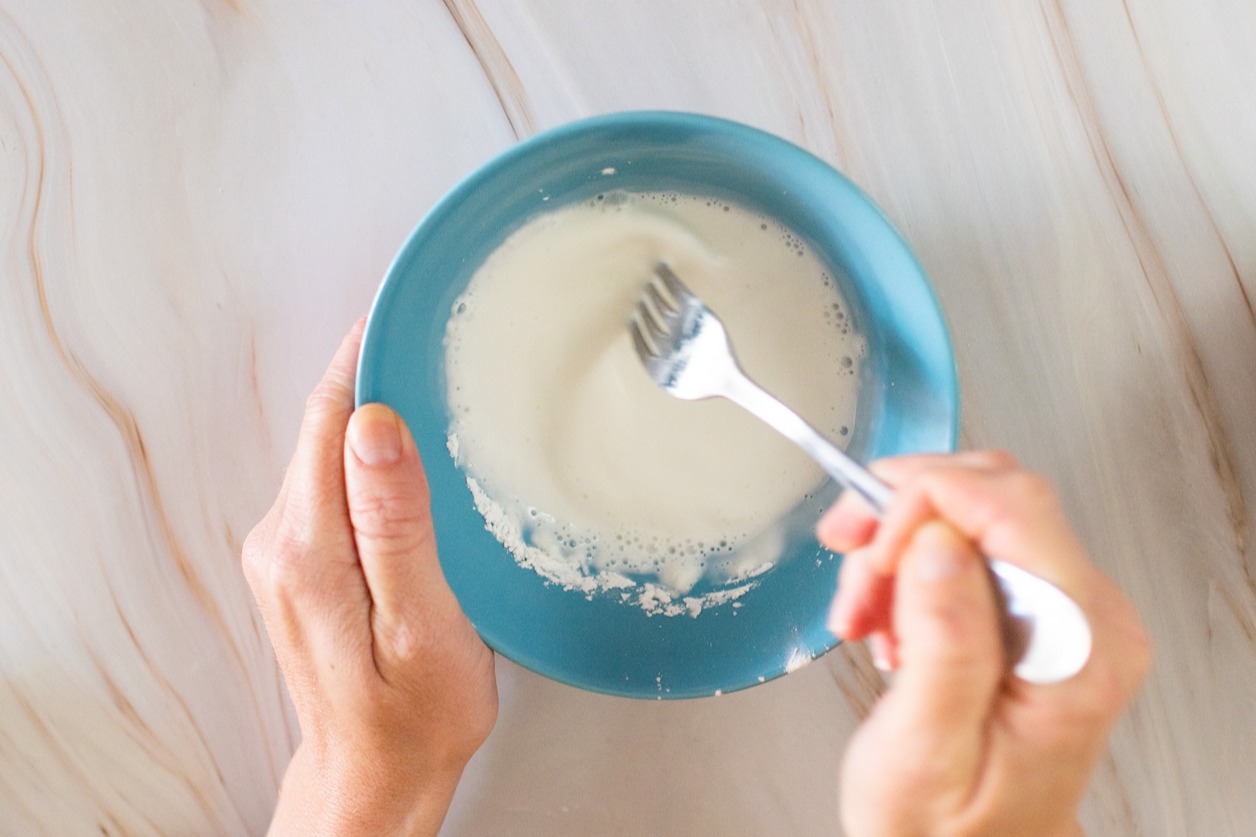
Whisk until smooth. You want the texture to resemble a thick cream vs. a heavy paste.

Step 4: Saturate Newspaper Strips & Apply Them To Your Sculpture Base

Dip a newspaper strip into your paper mache solution.

With two fingers, scrape off the excess paste.

Smooth the saturated newspaper strip over your sculpture base.

Cover your sculpture base entirely.
Add a minimum of two-three layers of saturated newspaper to your sculpture, and let them dry completely before moving on to the next step. The more layers you add, the sturdier your sculpture will be!
*Tip: if your paper mache solution gets too thick, add a few splashes of water and whisk. The paste will thicken as it cools, making it challenging to work with.
Step 5: Paint & Decorate Your Sculpture

Once your sculpture is completely dry, it's time to decorate!

Paint your sculpture with acrylic paint. If you are painting with a light color, consider applying a layer of white paint before adding other colors, and it will make the colors more opaque.

Allow the paint to dry completely before adding more layers. For my banana, I added three layers of yellow.

For my banana, I used black paint to add the details.

Use a small paintbrush to paint thin lines.


My bananas are so cute! These small sculptures would be adorable in a bowl of fake fruit or as party decorations! Need some paper mache inspiration? Check out my Pinterest board full of fantastic paper mache project ideas!
Want more earth-friendly DIYS? Check out these sustainable tutorials:
- DIY Beeswax Food Wraps Tutorial
- Create DIY Soy Candles at Home
- Dried Citrus Decorations- Make Wreaths and More!
- Cyanotype Tutorial- Printing with the Sun
- Hand Painted Pinch Pot Planters
- Sashiko Tutorial- Mending a Vintage Jean Jacket
Thanks for visiting! You can check out more DIY projects on our blog here.

JENNIE LENNICK
Designer, entrepreneur, and lover of crafts! Boss Lady at Jenny Lemons in San Francisco


