


DIY Sunshine Tea Towel: Learn Appliqué and Blanket Stitch
AppliquÉ Sunshine
By Jennie Lennick
Learn Applique and Blanket Stitch
In this DIY, I cover how to use HeatnBond to turn ordinary fabric into an iron-on patch. Then I share how to use the blanket stitch to secure your fabric pieces together permanently. In my example, I stitched a cute sun onto a gingham tea towel. I can’t wait to use it on a picnic!
Let's Get Colorful!
I’ve been obsessed with embroidery for decades but started adding appliqué to my projects only recently. Appliqué is a quilting technique in which a sewist stitches one piece of fabric to another. It's used to incorporate additional colors and textures into embroidery projects.
In a way, it felt a bit like cheating- I was accustomed to diligently stitching every detail in my embroideries. With appliqué, I could cover larger areas of my piece with ready-made fabric! Suddenly I was churning out artwork in record time!
Gather Your Materials

As an Amazon Associate we earn from qualifying purchases. Thank you for checking out our recommendations!
SHOP OUR APPLIQUE KIT

Step 1: Cut Out Your Shape
I am stitching a circle on my fabric, but you can cut out whatever shape you’d like! I recommend smoother shapes vs. jagged ones to begin. The rougher the cut, the more likely your fabric will fray.

Use a template to trace your shape onto your fabric with a water erasable marker.

A masking tape roll worked perfectly for my circle!

Carefully cut out your shape.
Step 2: Make Your Fabric into a Patch

Iron HeatnBond onto your fabric according to the package instructions. Use a paper towel to protect your iron and ironing board.
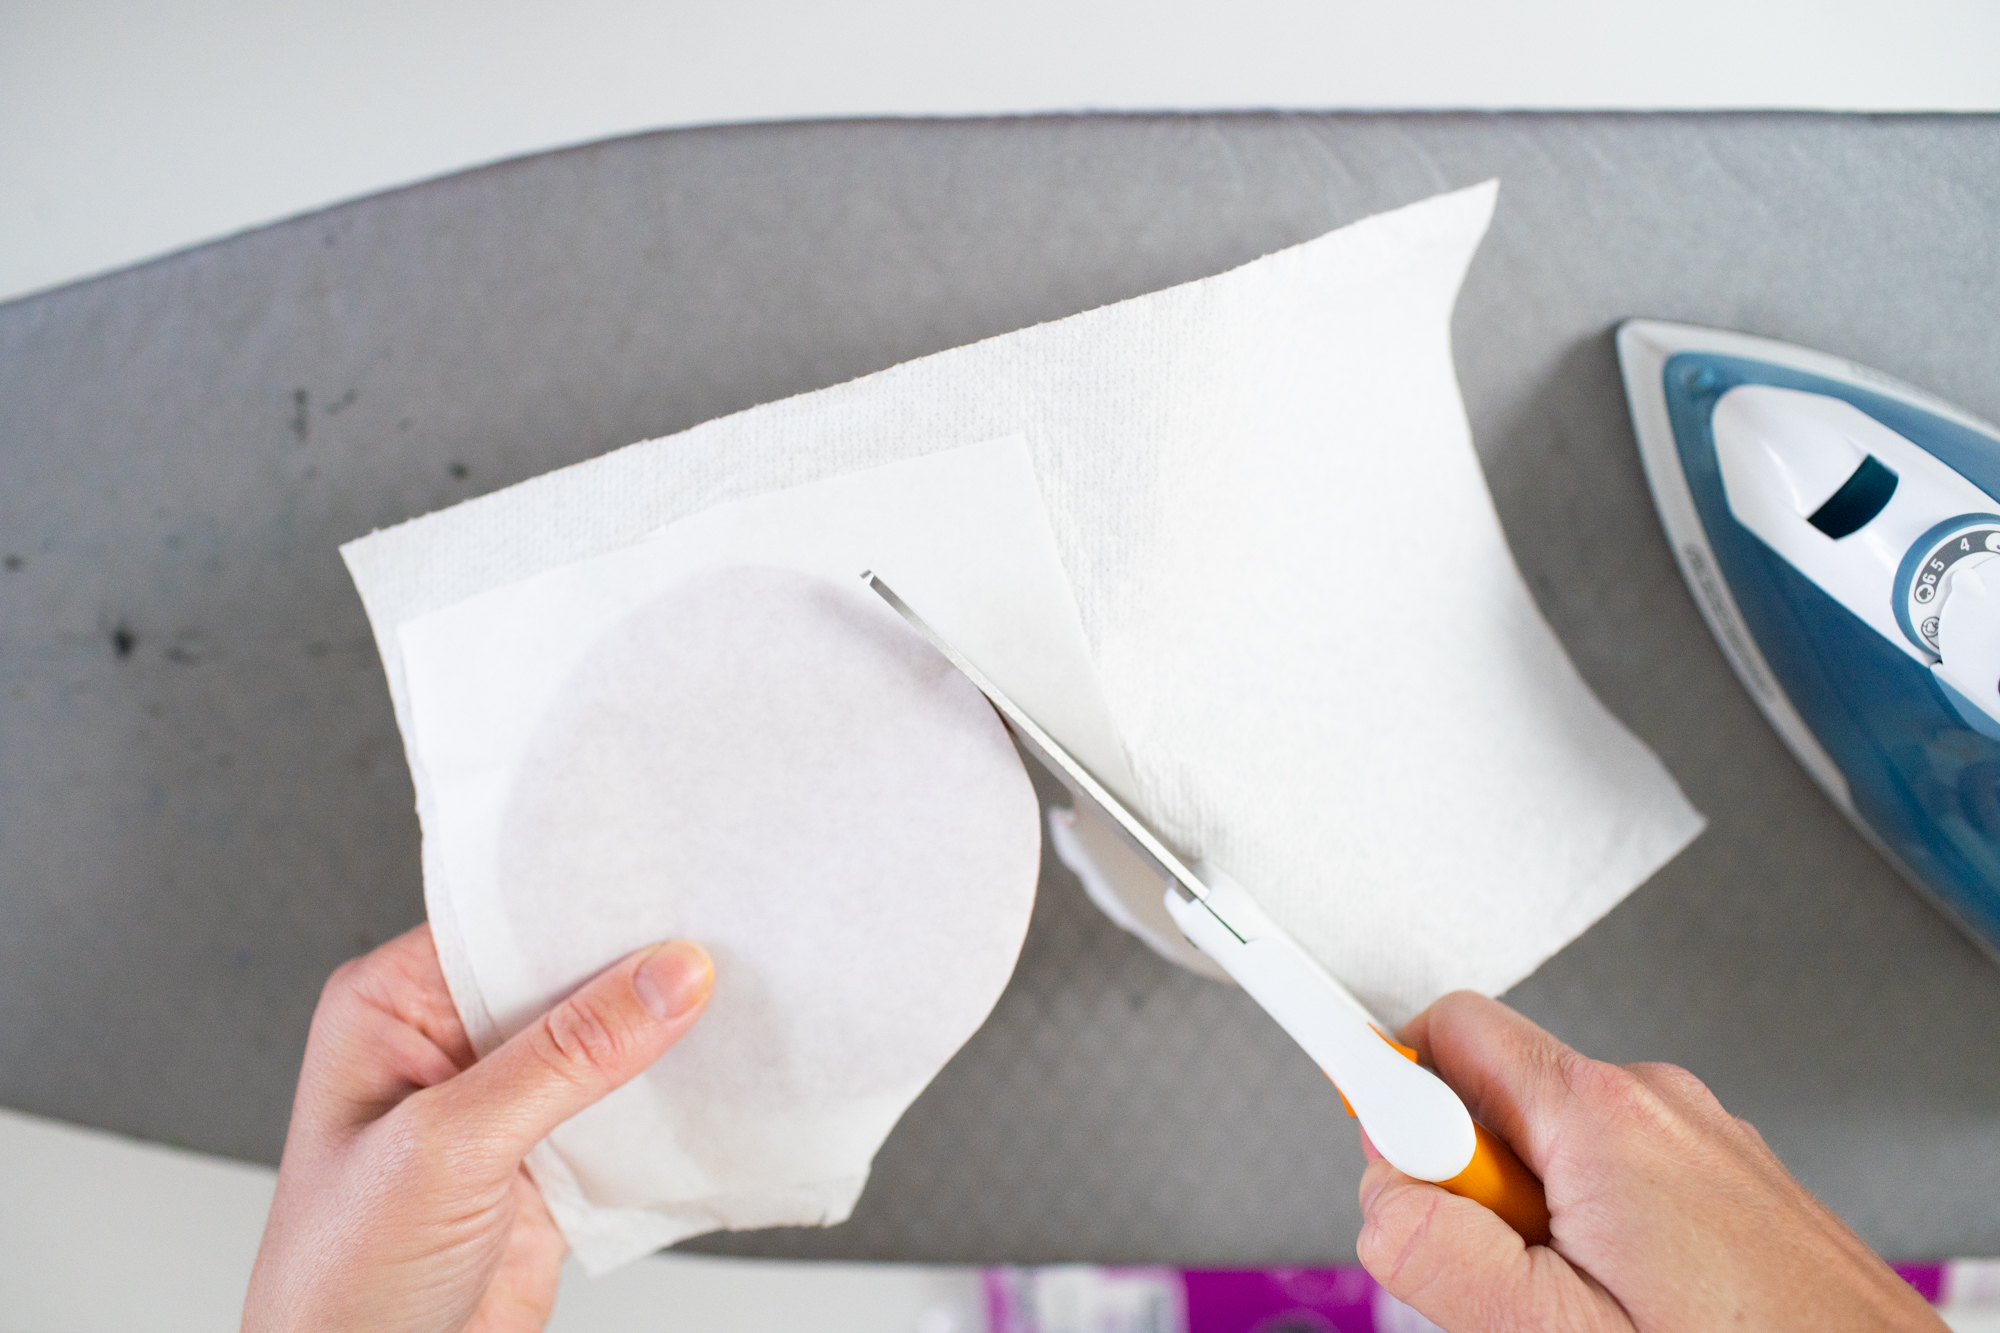
Cut the HeatnBond to match the size of your shape.

Peel the backing paper off the HeatnBond. After ironing, there will be a layer of unmelted glue adhered to the back of your fabric.

Place your fabric shape on your background fabric and iron it on. It will take a couple minutes- make sure it’s really stuck!
Step 3: Blanket Stitch

Blanket stitch, also known as buttonhole stitch, is as beautiful as it is functional. Most people have seen this stitch used on the finished edges of blankets or in appliquéd quilts.

Insert your fabric into your hoop. If you're new to embroidery, check out our blog Getting Started With Embroidery for instructions on how to stretch fabric, thread a needle, and knot your thread.

Thread your needle with three strands of embroidery floss. Begin by piercing your needle through the fabric from the back and emerging on the front, on the edge of your fabric circle.

Next, insert the needle at the A and push the needle to poke out through B.

Tuck your thread underneath the point of your needle.

Pull the needle through the fabric and in the direction of the corner.

You have one blanket stitch!
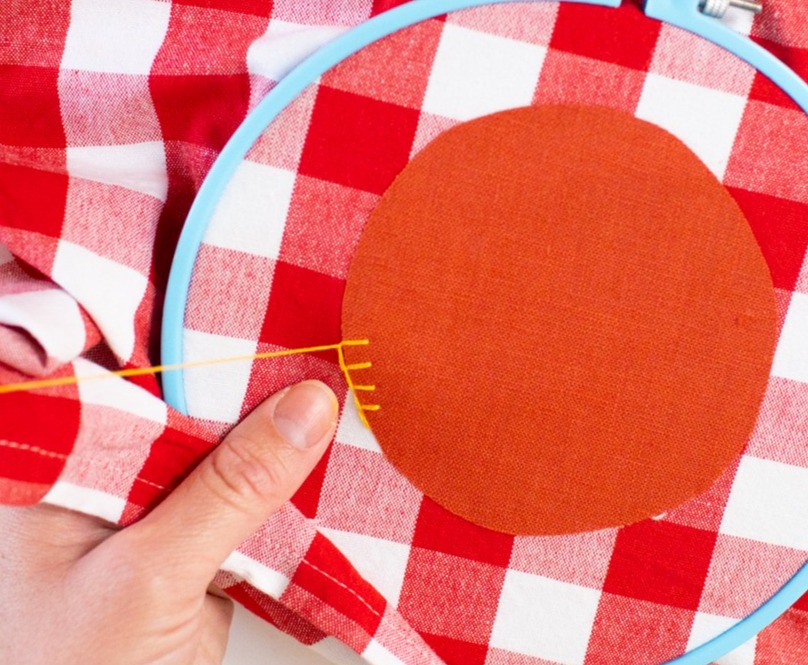
Each blanket stitch is held down by the one next to it in line, like a series of interlocking L-shaped stitches.
Continue stitching until your entire fabric piece is secured.
Note: if you forget to put the thread underneath the needle, you will end up with a stitch that looks like a slant. Don’t worry; not all is lost here! Take your needle and slide it underneath that slanted stitch. Pull it towards that corner, and you’ve corrected your mistake.
Step 4: Add Facial Features

With your water erasable pen, draw your facial features. I am using the blanket stitch to create cute eyelashes!
Stitch the rest of the face with a backstitch. The backstitch is an essential embroidery stitch for outlines! For a detailed tutorial on how to accomplish this stitch click here!
Step 5: Display and Enjoy!

SHOP JENNY LEMONS


Wow, I love my piece! It's so sunny and spruces up my kitchen nicely.
Have you tried embroidery? We have a ton of blogs to get you started! Learn the essentials of embroidery with our Getting Started with Embroidery Tutorial. We have individual instructions on the French Knot, Backstitch, Lazy Daisy Stitch, Sashiko, and Running stitch.
If you get stuck, make sure to check out our E-course and become an embroidery master!
What do you love most about embroidery? Share your favorite projects in the comments below!
Want More Needlework Projects? Check out these tutorials!
This post was originally published on 7/20/2021 and updated on 7/1/2022. Thanks for visiting! You can check out more DIY projects on our blog here.

JENNIE LENNICK
Designer, entrepreneur, and lover of crafts! Boss Lady at Jenny Lemons in San Francisco
